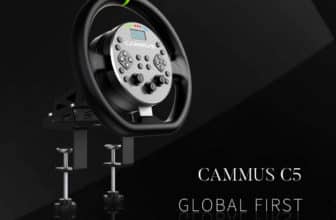
The Cammus C12 base has a clear ambition: to tease the big names in sim racing by offering an all-in-one Direct Drive flywheel that’s powerful (12Nm of constant torque) and really cheap (around $549 or €505). Does that raise an eyebrow? Then let’s check out thedivine childtogether.Because if Cammus has succeeded in its gamble, a new religion could be born among simracers!
Cammus C12 in brief
| Compatibility | PC |
| Dimensions Weight | Width 30cm, height 30cm, depth 10.6cm (excluding mounting hardware) 4.8Kg |
| Motor | Direct Drive – External Rotor Servo Motor |
| Torque | Peak : Not communicated Constant: 12Nm Slew Rate : Not communicated |
| Encoder | Not communicated |
| Turning range | 180° to 2520° Adjustable via software |
| Connections | 1 USB-B output to PC 2 USB-C for Cammus accessories (pedalset, shifter, etc.) 1 350W power supply |
| Installation | 4 M6 screws at 6.5cm and 8cm centres OPTION: 2 Steel table clamps supplied with steel bracket with 3 tilt settings |
| Wheel mounting method | 6x70mm centers for changing the wheel hoop. |
| Customizable buttons | 10 backlit configurable buttons, 2 12-position rotary selectors, 4 clickable 2-position rotary encoders, |
| Wheel diameter | 30cm |
| Materials | Synthetic leather, Carbon fiber, Aluminum, Plastic. |
| Paddles | 2 magnetic paddles with carbon-fiber inserts. |
| Turn counter | LEDs configurable via Cammus software. |
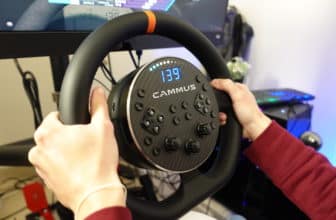
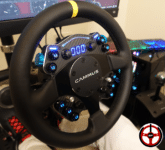
| Display | 3-digit OLED |
Design and ergonomics

In the box:
- C12 (integrated base/flywheel),
- USB-A/USB-B cable,
- Aluminum frame mounting brackets,
- Fan,
- Screws and Allen key,
- 350W power supply (and ENG and EU cords),
- Chinese/English manual.
When we received the Cammus C12, I can tell you we were surprised! We weren’t expecting to see a model that claims to be a “mid-range” and uses this type of “flywheel and integrated motor” construction. The Chinese had already done it (brilliantly) with the Cammus C5, but that was an entry-level product. After this initial surprise, Flo and I began to examine the C12 from every angle. Aluminum housing, carbon-fiber steering wheel face, carbon-fiber magnetic paddles… A wide range of functions, with backlit buttons, a 3-digit display and LED lap counter… A sight to behold!
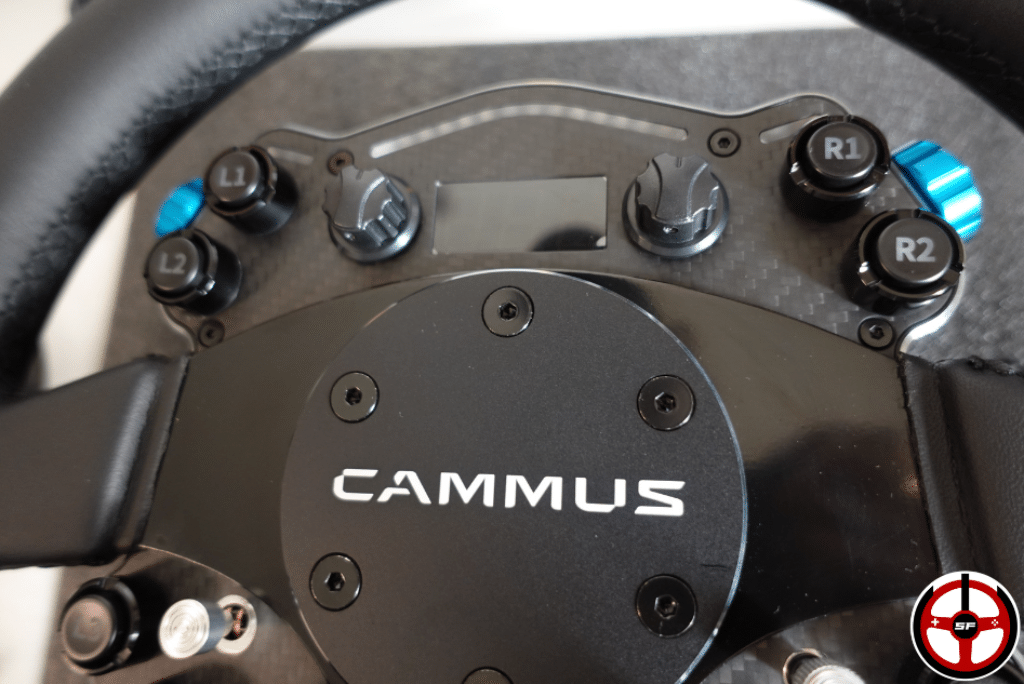
The buttons bear a strong resemblance to the older models used by Simagic, with a rather long range of movement and a not-so-clear click. They’re not the buttons of the century, but they do have the merit of being backlit, and are a positive evolution from Cammus if you look at what they served up on the DDWB.
Rotary encoders for all tastes!?!
When it comes to rotary encoders, on the other hand, “not bad” rubs shoulders with “not great at all”. The two blue thumbwheels show signs of weakness in use, and are far too soft to be operated without realizing it. On the other hand, we were pleasantly surprised by those on the front of the steering wheel. The top two can be used in 12-position mode. The bottom two (metal) can only be used in – but their click is quite pleasant.

The faux leather feels very plastic under the fingers, but otherwise the finish is fine.
The steering wheel hoop does look a bit cheap, though. The faux leather is really low-cost, but do I really have the right to complain when the whole thing costs 500 euros? Not really, no. And if you’re really allergic to their faux leather, you can easily change the hoop, but I’ll come back to that.
An update on the engine
On the motor side, we have an External Servo Motor. The advantage of these motors is that they can offer as much torque as a motor generally twice as bulky, while being much lighter. To give a concrete example, the Cammus C12 weighs less than 5kg (including flywheel), while the Fanatec CS DD 12Nm weighs around ten kilos (base only). They’re also much less expensive.
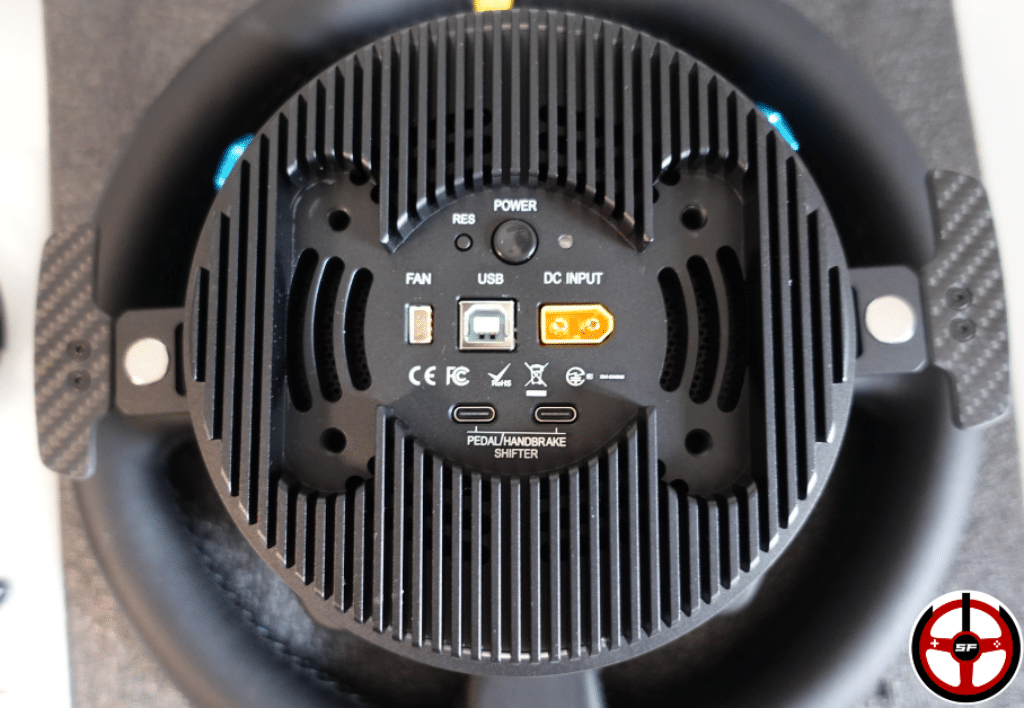
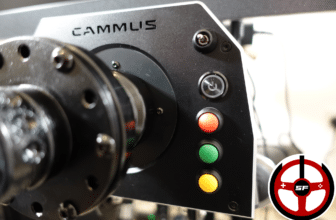
At the rear, you can see the connectors, and the air vents for the fan to keep the motor cool.
But these motors aren’t a miracle solution either. In the case of the Cammus C12, while responsiveness is up to scratch (although the brand refused to provide figures), in terms of detail and above all fluidity, don’t expect to match other bases of the same power on the market. I’ll come back to this in detail in the “track test” phase.
Installing the Cammus C12 on the chassis


OK, let’s move on to installing the base on the chassis. You have two options:
- Use the two aluminum arms that come as standard with the Cammus C12. In this case, you’ll need to attach the arms to the chassis support plate using 4 M6 screws. On the other hand, you’ll have to make do with the means at your disposal to install the small fan correctly behind your base (if you wish to use it, which I recommend you do).
- Buy the Cammus table clamp option. This allows you to mount the base either on a table with its metal clamps, or on a fixed chassis with its pre-drilled holes. Personally, I chose this option because you can also adjust the angle of the base with this bracket, and integrate the fan directly so that it does its job properly.
Software settings
Cammus has worked hard on the software, and it’s great to see! There are new pages for setting tower LEDs and backlit buttons. Each button and LED can have its own custom color. The motor settings also include a slider that lets you manage the maximum heat the base will take before reducing the force feedback torque.
FFB base settings include :
- Degree of flywheel rotation – 180 to 2520°,
- Base torque – 0 to 100%,
- Natural damper – 0 to 100%,
- Natural friction – 0 to 100%,
- Natural inertia – 0 to 100%
- Return to center of flywheel (out of play) – 0 to 100%.
So you have everything you need to create a customized force feedback. The damper and friction are a little lacking in finesse (in my opinion), especially in the lower percentages. It quickly puts a lot of stress on the steering shaft, when you’d sometimes like a little subtlety to get the most out of the engine. Still, I have to admit that the brand is moving in the right direction.
Then there’s a second page for adjusting the play effects, which I wouldn’t recommend unless you know exactly what you want. If you need to adjust game effects, it’s more practical/simple to manage them directly in your game most of the time.
How to change the steering wheel on the Cammus C12
As I mentioned earlier, you can “easily” change the steering wheel hoop. This is your chance to say goodbye to the cheap fake leather supplied as standard. To do so, simply remove the 6 screws holding the brain in place and change it for the one of your choice.
The center distance for attaching a new steering wheel is 6x70mm. This means that the vast majority of simracing or even real flywheels sold on the market can be installed on the motor. I’m thinking, for example, of the wooden flywheels I mentioned a while back. Be careful, however, not to choose a steering wheel with a Tulipage, as this will ruin your access to the paddles and buttons.
Comfort and feel
Whoa, what’s with the grain?
Sam discovers the C12’s FFB for the first time.
After switching on the base, letting it calibrate itself and taking a quick look at the software, I take my first laps around the track. I always do the very first tests with the factory settings, to see what the “out of the box” experience is worth. And in the case of the C12, this first experience only lasted a few minutes.

Backlit buttons still have trouble with warm colors. Witness the “bright red” I tried to bring out on the R1/R2 buttons. Still, the effort is obviously appreciated.
The cause? The very present friction in the force feedback that the brand chose to put at 20% in its software. This friction literally killed all the base’s responsiveness and ate up most of the fine details. So I went straight into the software to remove this friction and OH surprise! I realized that this friction was (obviously…) hiding cogging. Well, cogging, I’d like to say, is to be expected on a 500-bullet base with a 12Nm rating. But that’s not all. Above all, this friction hid some grain in the movement of the steering wheel.
And when I say grain, I don’t mean something light that discreetly fades away when you’re in play. I’m talking about a grain that’s present in every turn, every suspension bounce, every input you put into the steering wheel. A grain that can even be clearly heard! And that a novice might take for something “normal” if he’s never had a Direct Drive base before.
Is it worth eliminating this grain?
I’m telling it like I think it is, this grain doesn’t belong there. It can’t be removed unless you put damper and/or friction at levels that will kill the base’s detail and responsiveness.
So you’re going to say to me “Sam, I don’t give a damn about having a responsive and detailed base”. To which I’d reply… First of all, there’s no point in reading my tests if you don’t give a damn about the stuff you buy. But above all, without responsiveness and detail, you wouldn’t be able to feel the grip of your tires, your loss of adhesion or catch your vehicle if it’s about to go off the rear axle. In short, your equipment would work against you.
So what to do? Accept this permanent squall in the force feedback to maintain the base’s technical capabilities. It’s not pretty, it doesn’t belong there, but at least it’s reactive, fairly precise and it’s controllable!
The upside on the track
Don’t think that I’ve found only bad things about the track. In fact, I’d have to say that in terms of functionality, ease of button access and the pleasure of activating the paddles… The Cammus C12 does a great job! Everything is naturally accessible. It’s strong enough to give you a good time, and even to get you through some pretty rough sections (if you like Indy oval racing, you’ll quickly find yourself muscled up on one side). The only point to be reviewed in terms of functionality are the blue rotary selectors on the thumbs, which are just begging for their lives to be over. Other than that, well done Cammus.
Heating the base
For the heating tests, I first wanted to test the Cammus C12 without its fan. The aim was to see how long it would last at full power and in unfavorable conditions if the buyer didn’t want to take the table clamp option, which allows the base fan to be fitted correctly.
Temperature test:

Time (minutes)
Above, the heat build-up quickly stopped when I plugged in the fan.

After about 40 minutes, I noticed a drop in torque in the force feedback. The base had therefore reached its maximum temperature before the safety cut-out (which I had set at 85°C). I waited a few more minutes, then decided to switch on the fan. And at first glance, given its tiny size and puny appearance, I was pretty sure I was going to send it to hell.
But the valiant little fan proved me wrong! In just 5 minutes, the base had lost more than 20°C. And the base was back to full torque with no fear. So if you drive with the fan on, you’ve got nothing to worry about in terms of overheating.
Who would I recommend this Direct Drive Cammus to?
Well, above all to occasional gamers who want a lot of torque without having a fixed chassis at home. The C12 is lightweight and easy to install/uninstall, making it a good companion for quick weekend jaunts. But to adopt it, you need to keep these points in mind:
- It will always have a little grain in the force feedback unless you sacrifice its responsiveness to make it an accident simulator.
- You won’t be able to change the steering wheel between races, as you usually can on other bases equipped with a Quick Release system.
- On-track detail is better than the old DDWB, but don’t expect miracles either.
My verdict on the Direct Drive Cammus C12