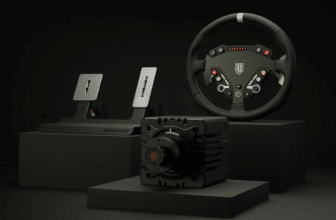
I’ve been wanting to try it out for a long time, and now I finally have. This week, I give you my conclusions on the Simgrade VX Pro pedals. A Finnish simracing pedalboard that offers a rather surprising and interesting approach to pedal movement. But as you’ll see, not everything went according to plan!
Prices and deliveries Best Values
Simgrade VX Pro Pedals technical specifications
| Compatibility | PC. Playstation if coupled with DriveHub adapter. |
| Pedals | 2 pedals (accelerator-brake), Clutch optional. |
| Gas pedal | Spring-loaded movement with non-linear kinematics, Load Cell sensor with 100Kg capacity, |
| Brake | Spring-loaded, non-linear kinematics, Load Cell sensors with 200Kg capacity (Do not exceed 90Kg max on the pedal!), |
| Clutch (optional) | Spring movement with kinematics, Load Cell sensor with 200Kg capacity, |
| Vibration | No |
| Chassis mounting | Screw directly onto your chassis. Optional support plate. |
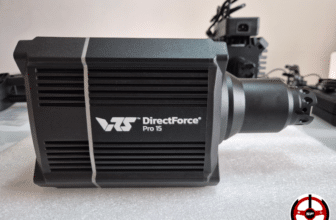
| Connections | Control box with USB-C USB-A socket for connection to your PC, |
| Options | Pedalboard support plate, 94,66€ Clutch pedals, 190,28€. Simple heel rest, 33,47€. Heel rest with foot rest, 37,30€. Foot support for brake pedal, 74,54€. Lateral footrest for gas pedal, 27,73€. Red and blue brake springs. 2 arms to modify brake hardness settings. |
Design and ergonomics
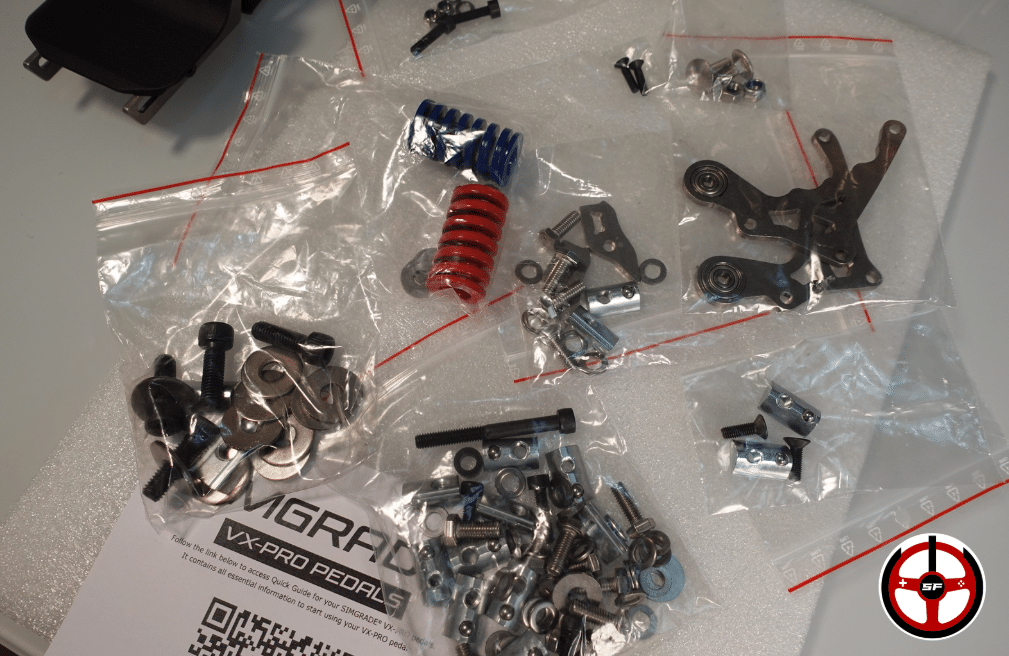
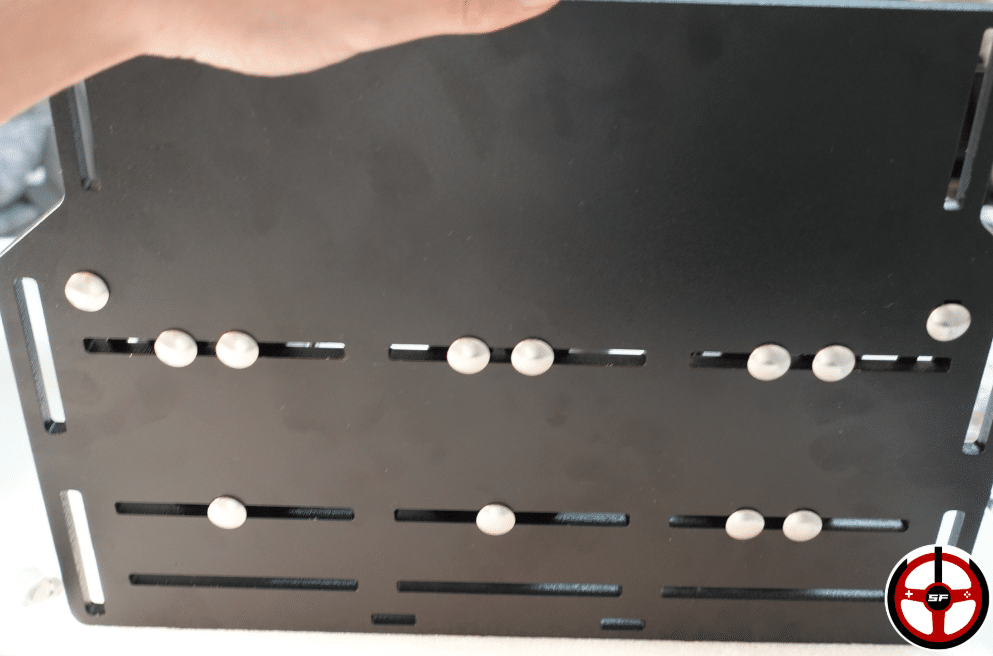
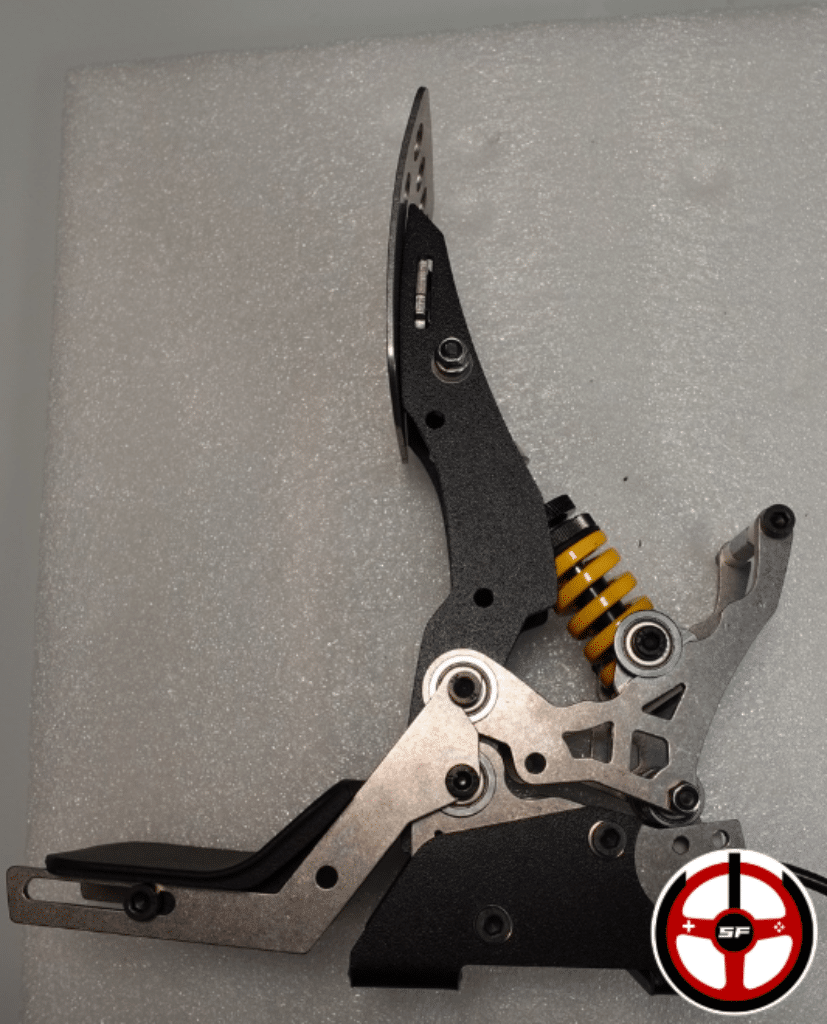
In the box (2-pedal version without options):
- Simgrade VX Pro pedals.
- 1.80m USB-C to USB-A cable.
- Control box.
- Screws, spacers, washers.
- 2 guides to modify the clutch feel.
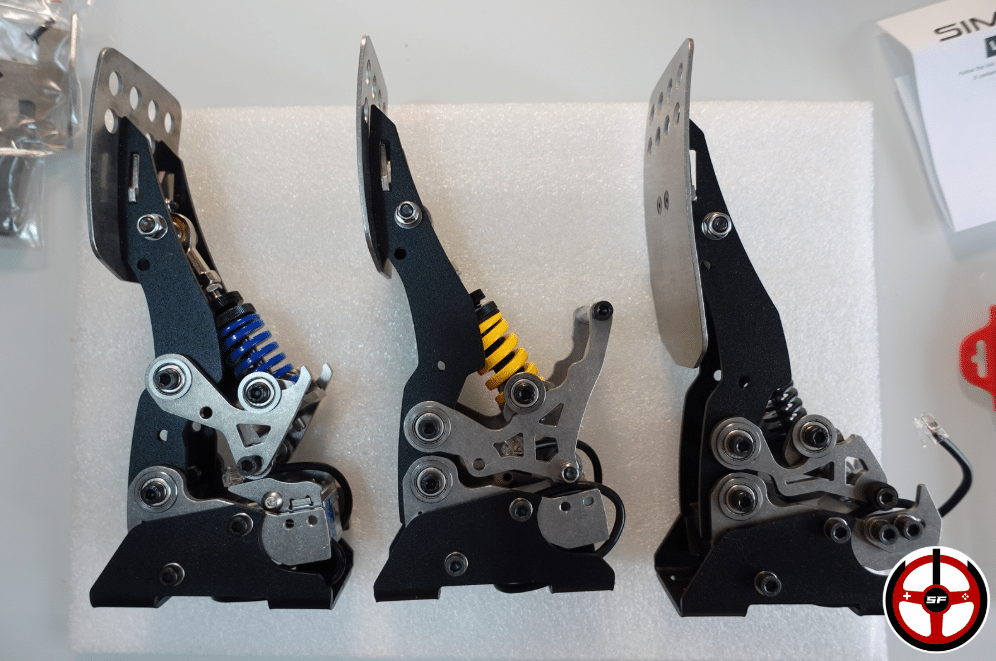


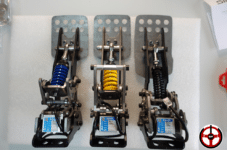
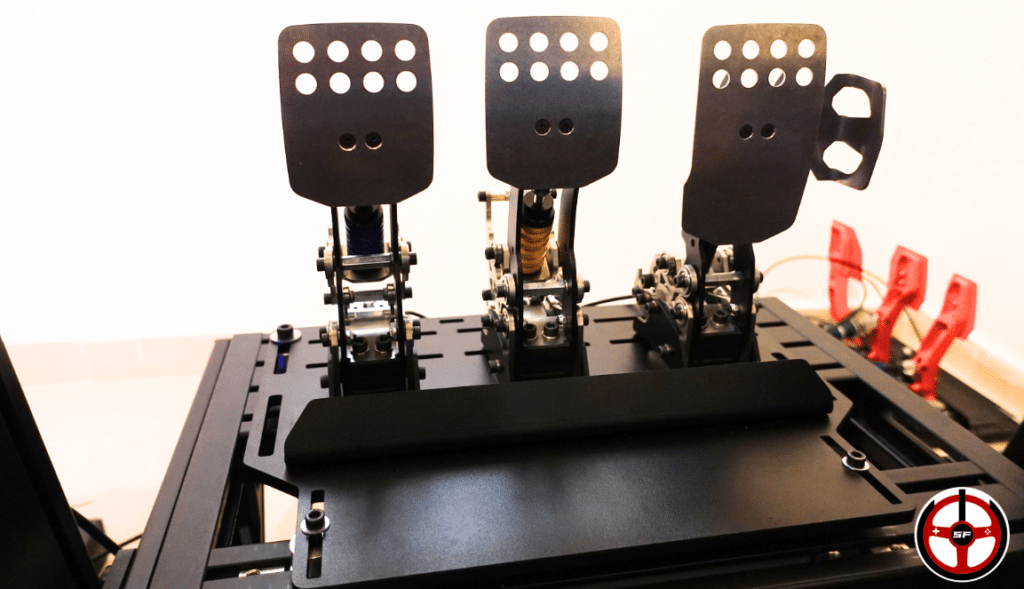
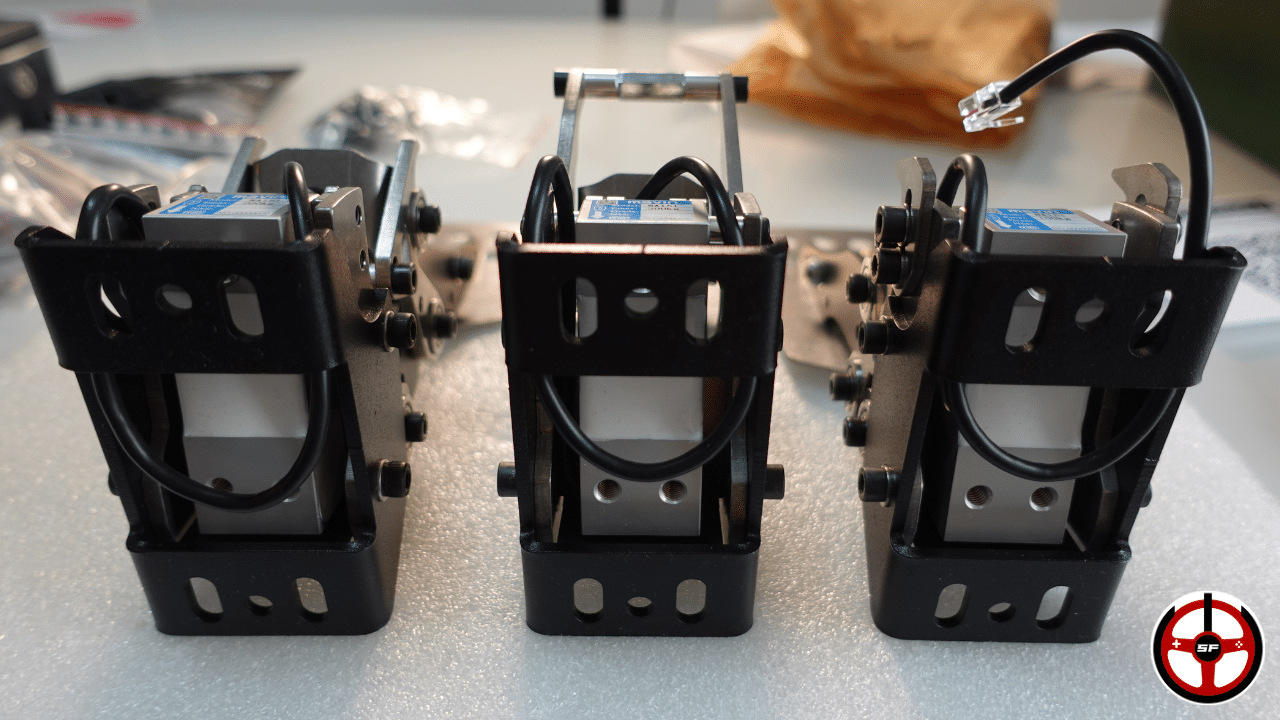
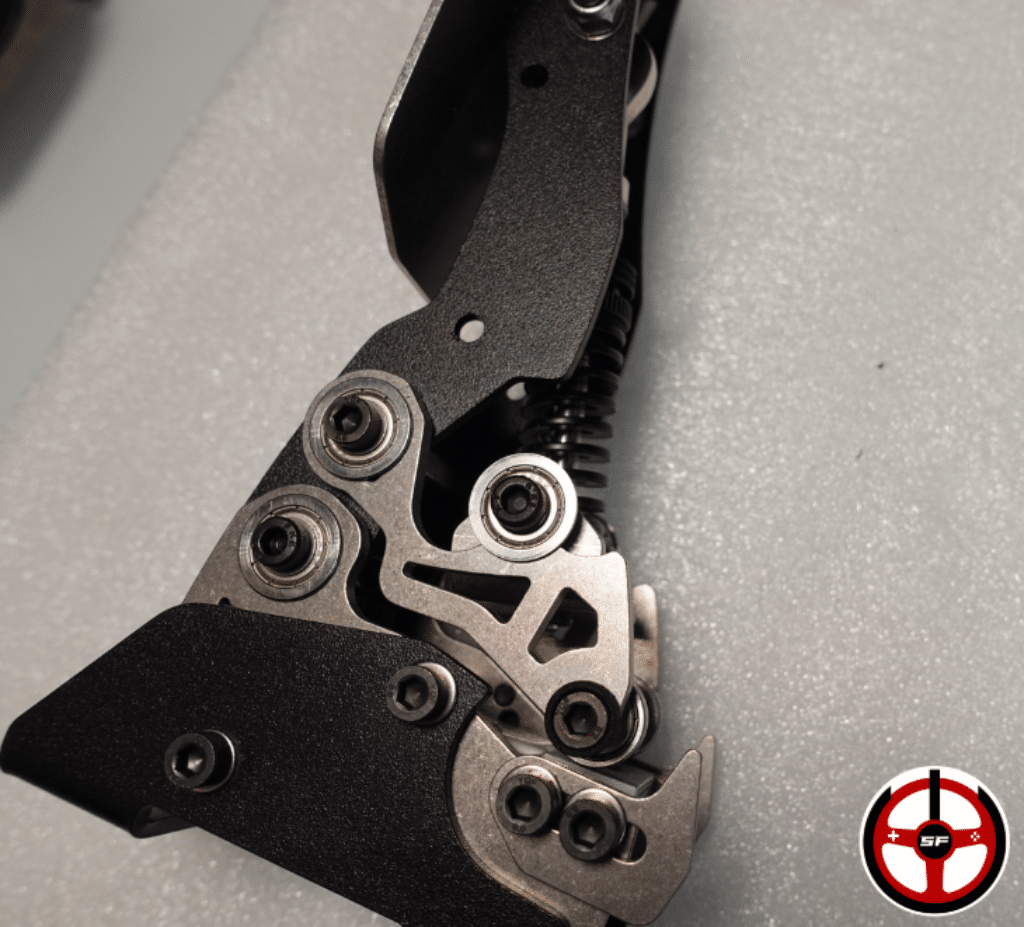
I start by unpacking the gear. The first thing I notice is that everything is made of steel and aluminum, which is pleasing and gives an initial impression of robustness. The pedal pads are very large and smooth, which I personally like, but that’s subjective of course. And at the rear of each pedal is a large Load Cell. But where the pedalboard surprises most when you take a look at it, is in the kinematics of its pedal movements. In simracing, we’re used to seeing linear movements on the gas pedal and brake, followed at best by progressive movements on the clutch.
In the case of the Simgrade VX Pro, we have progressive kinematics on all three pedals. The spring axles of each pedal are fixed to the pedal upright, but on the other side are ball bearings that roll over the Load Cell sensor, guided by metal plates to create feelings far more interesting than linear springs.
The control box is made of plastic and can be attached to your chassis. A 1.8-meter USB-C USB-A cable is supplied to connect the box to your PC. Last but not least, the red and blue springs are included in a bag to modify the brake’s overall hardness.
The quantity of screws, nuts and washers is impressive! We’ve got enough to build a chassis with everything that comes with the pedalset. But of course you’ll need all this to install the ton of options available.
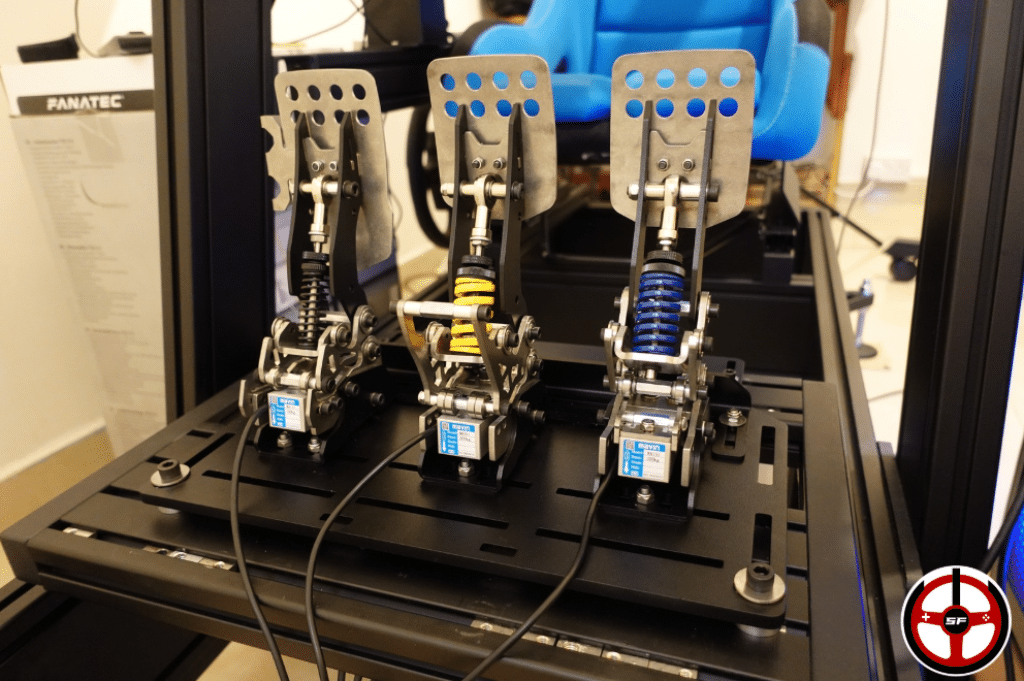
Mounting the pedalset on the chassis
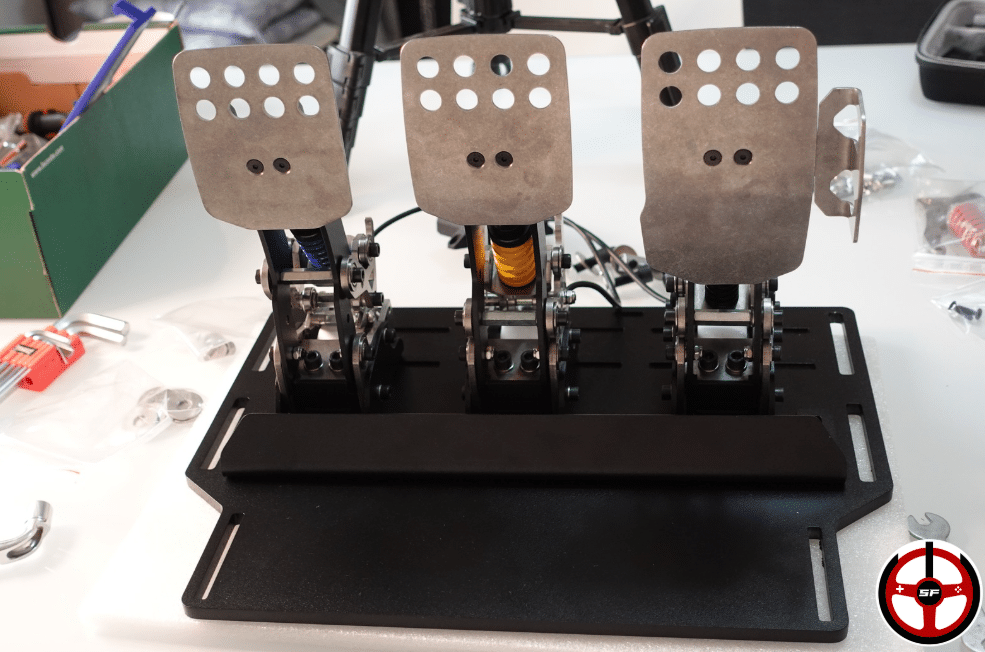
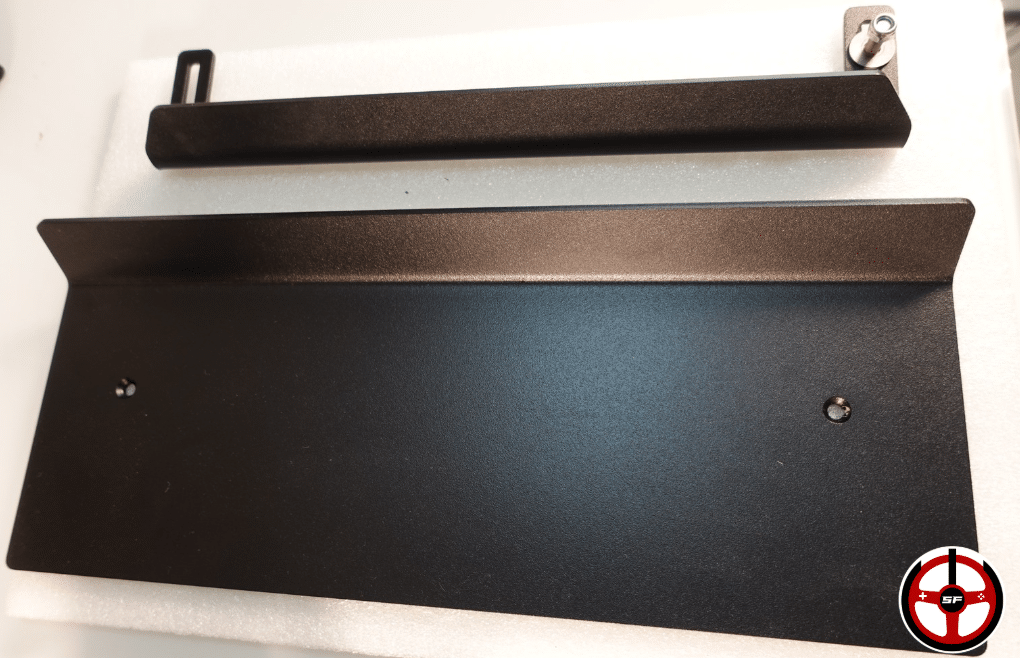
Let me quickly move on to mounting the pedalset. Personally, I chose to install it on its support plate (sold as an option). It’s made of steel and is 8mm thick, so you won’t have any bending problems with it, even when you’re slamming on your brakes like an ox.
Each pedal is screwed onto rails that allow them to be moved over a width of 9cm. Screwing in the pedals is a bit tedious ! At the front, it’s easy because you can access the nuts even with a pipe wrench. At the rear, on the other hand, you have to use a small open-end wrench, making short movements each time. A bit tricky, but in 5-7 minutes it’s sorted.
Depending on the mood of the day, I’ll juggle between using the heel pad (sold as an option), which can also be adjusted in depth. Or with the foot support that can be placed on the brake pedal (also optional).
Finally, I connect the pedals to the control box. Then I connect the control box to the PC, and off I go for calibration using the brand’s software.
Setting up the Simgrade software
I start by downloading theSimgrade application, which you can find here.
The first thing to do, of course, is to calibrate the pedals. You’ll be able to create pedal-by-pedal calibrations and save them for later use, depending on the hardness you choose for each input.
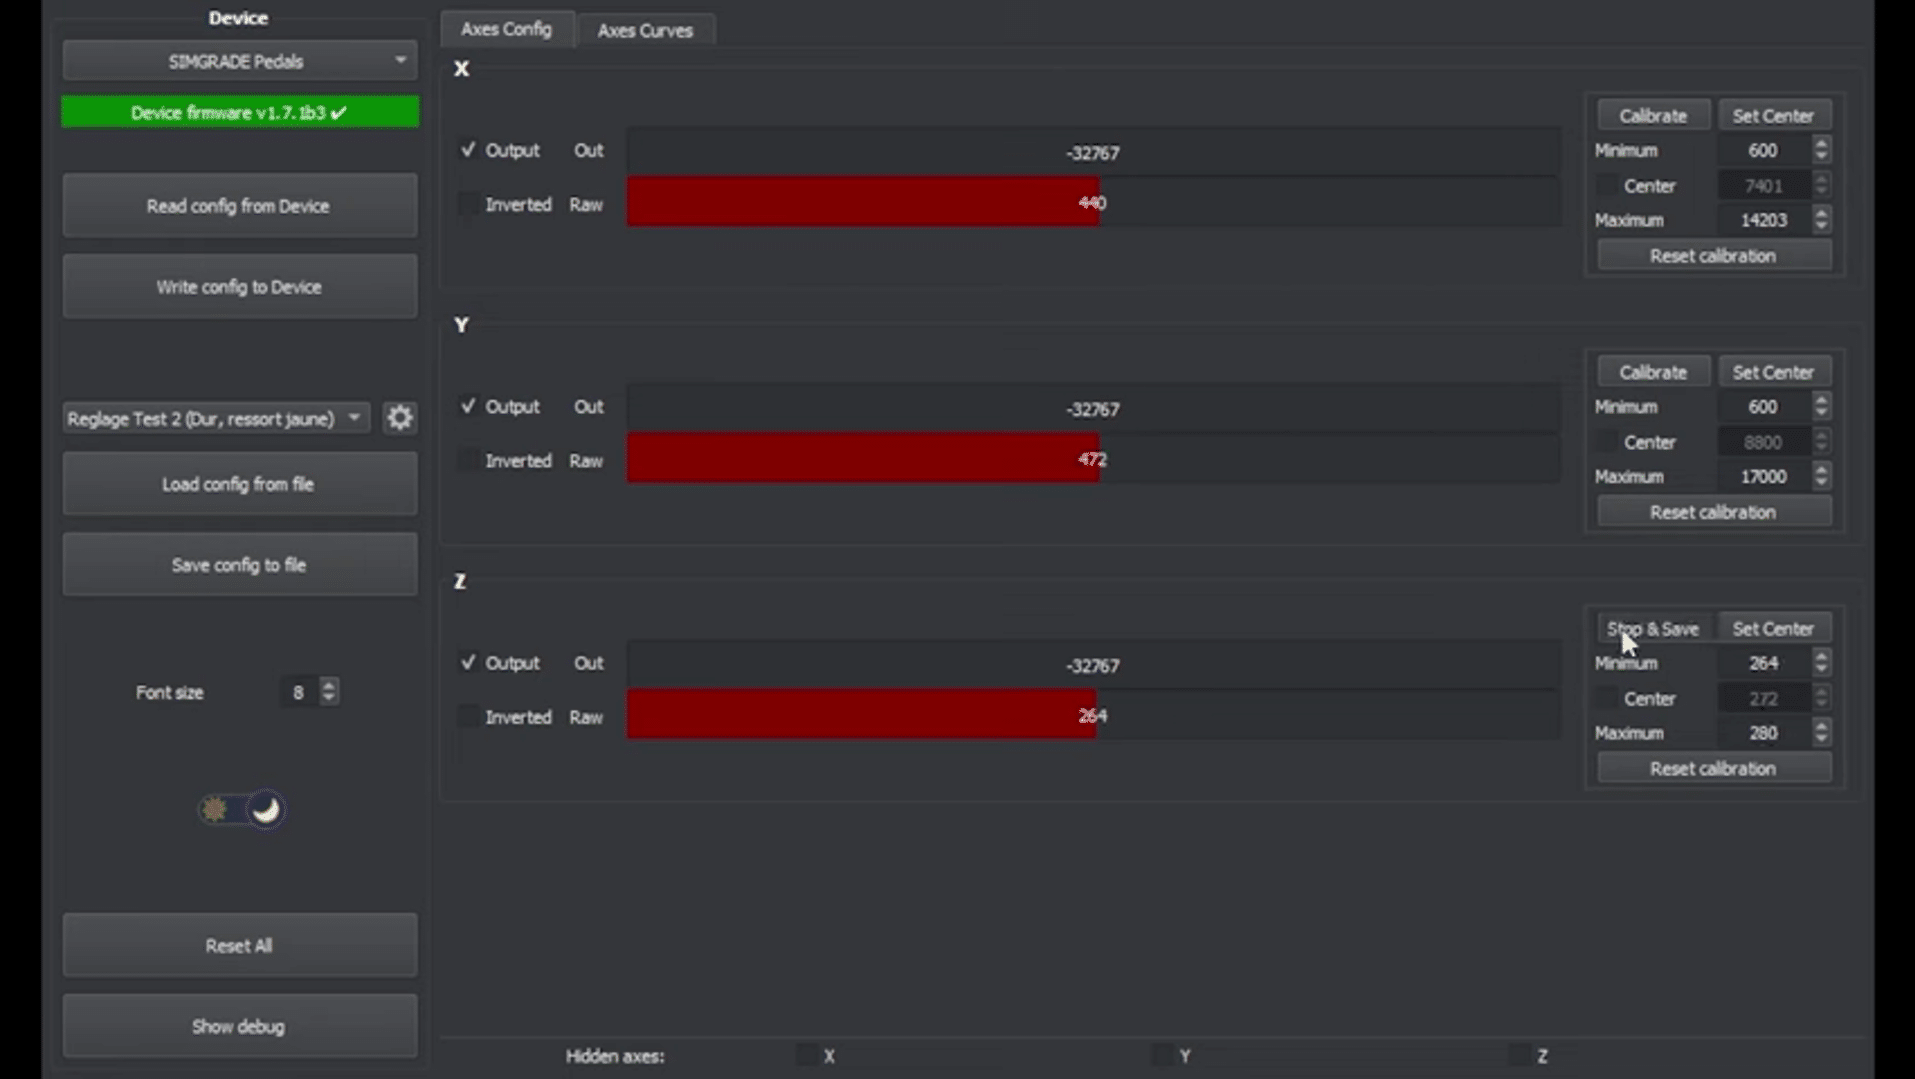
Next comes the adjustment of dead zones at the top and bottom of the movement. This is a little more complex than usual. You’ll need to look at the “Raw” value when your pedal is at rest, then in the right-hand column, add, for example, 150 or 200 to this value to create a dead zone at the start of the movement. Then look at the Raw value when the pedal is pressed, and in the right-hand column, remove a value of your choice to create this high dead zone. Of course, I’m giving you a value that suits me personally, but it’s up to you to find the one that’s right for you!
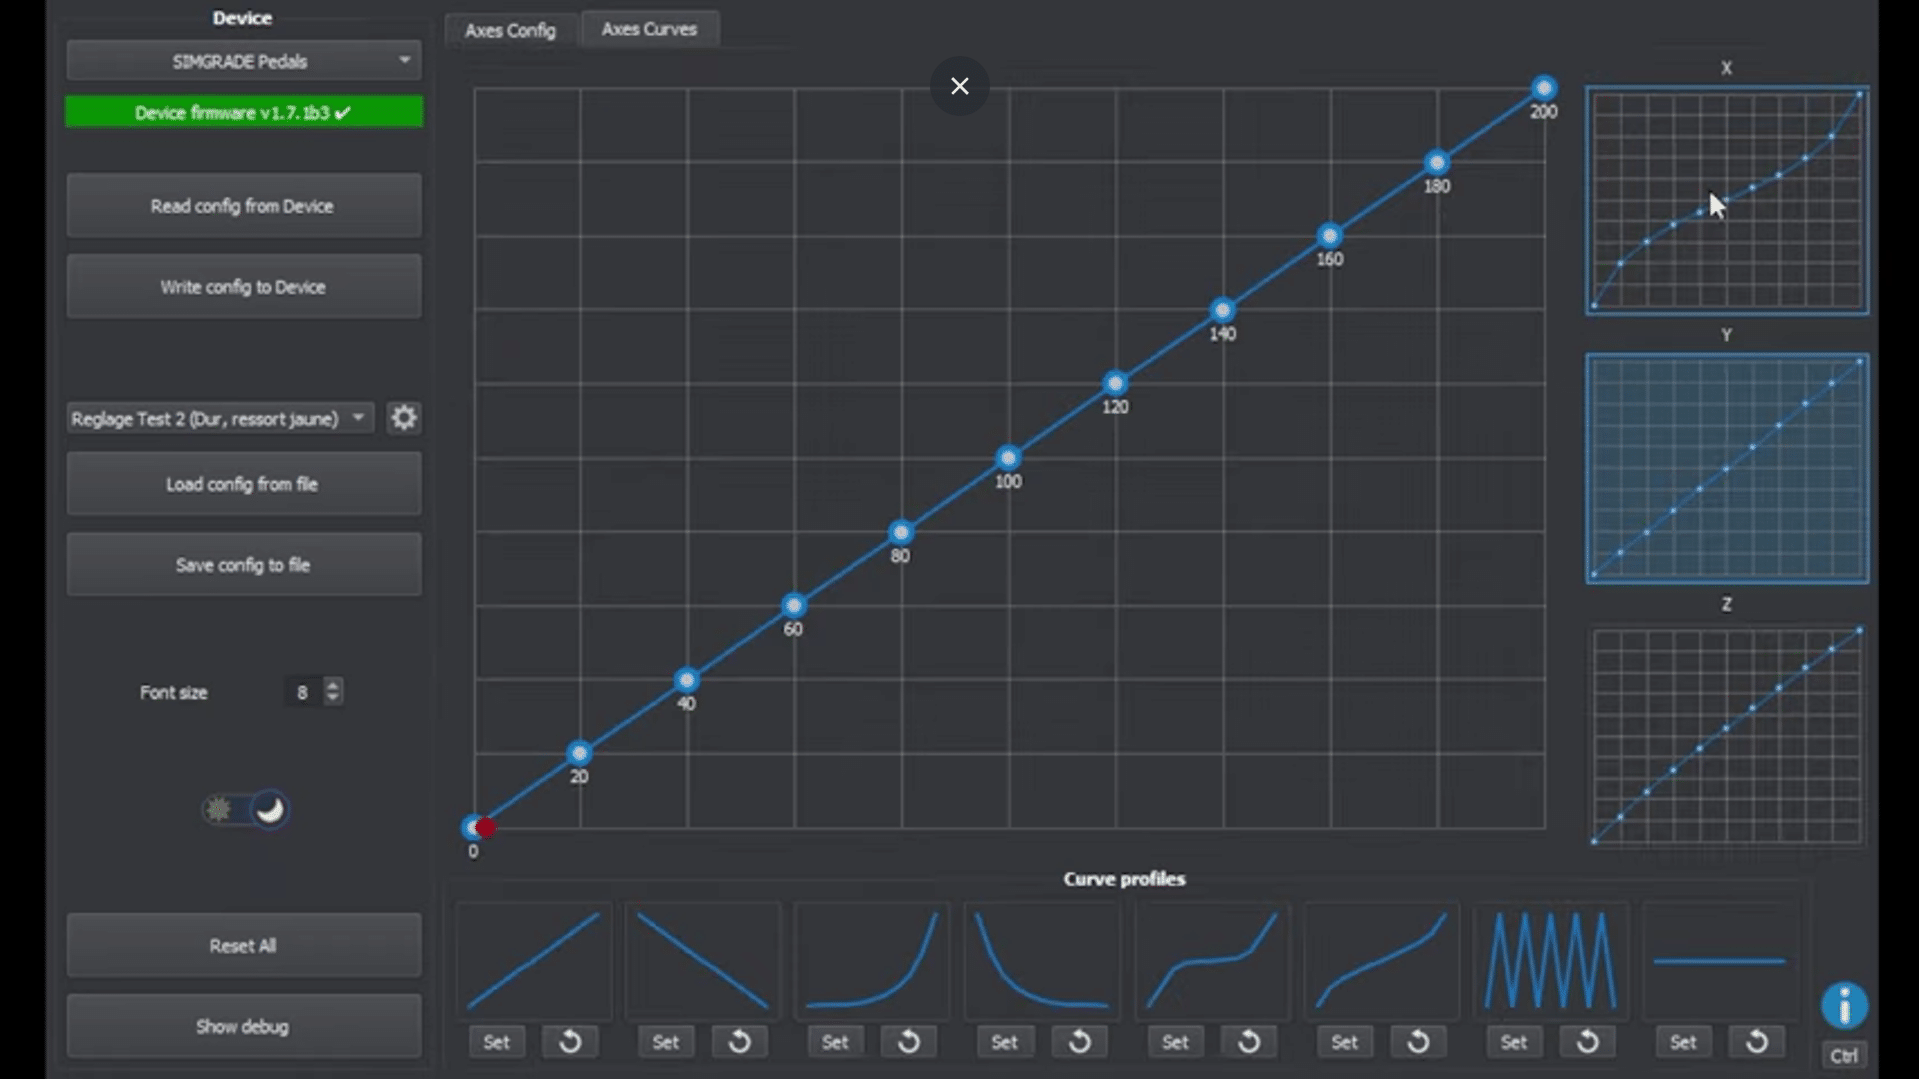
Next, we’re going to create some input curves. Nothing too complicated here, just choose a standard curve and modify it by dragging and dropping with your mouse.
Once you’ve made your changes, remember to save the settings and click on “Write config to Device” to bring the pedalboard up to date!
Setting up the pedalboard
When I get to the physical settings of the pedalboard, I quickly realize that it’s pretty complete and that I’m going to have a hard time explaining it all in simple terms. So I’m going to go pedal by pedal to give you the full picture.
For all assembly/disassembly/reassembly details, I STRONGLY urge you to always have the manual to hand. Some adjustments require you to really take your time to do things correctly, without forgetting any parts and without reassembling the equipment the wrong way.
On the gas pedal
- Generaltilt of the entire pedal 0° and 8.5° to the rear [with tools].
- Pedal plateheight 1cm [with tools].
- Springpreloading [without tools].
- Movementhardness adjustable on the fly via 3 axle positions [no tools required].
- 2 gas pedal stops to modify pedal stroke length -4mm [with tools].
- Front gas pedalstop to increase pedal stroke by 1mm [without tools].
- Remove the spacer on the bearings to extend the stroke a little further.
- Whether or not to fit the optional lateral foot support [with tools].
On the brake
- Generalinclination of the entire pedal 0° and 8.5° to the rear [with tools].
- Pedal padheight 1cm [with tools].
- Change spring (3 springs in all in the box) to modify overall brake hardness [with tools: easy – without tools: be careful not to lose any washers in the process].
- Change brake stroke length before hard point by adding/removing spacers in the spring axis [with tools].
- Springpreloading [without tools].
- Movementhardness can be changed on the fly via 4 shaft positions [no tools required].
- Change of guides for on-the-fly hardness adjustments [with tools].
- Front brakestop to increase pedal stroke by 1mm [no tools required].
- Installation or removal of optional foot support [with tools].
On the clutch

- Generaltilt of the entire pedal 0° and 8.5° to the rear [with tools].
- Pedal plateheight 1cm [with tools].
- Springpreloading [without tools].
- Movementhardness adjustable on the fly via 2 axle positions [no tools required].
- Guide position for progressive feel of movement to reduce/increase stroke length.
- Change the guide to modify the overall feel of the movement [with tools].
- Front gas pedalstop to increase pedal stroke by 1mm [without tools].
- Move bearings at rear of pedal to reduce stroke.
Comfort and feel on the track!
I’m not going to hide it, there were some very pleasant surprises, but also a few points of frustration during the rides. Let’s start with the frustrations:
First of all, it took a good 3-4 days before I managed to find the right brake setting. What took so long was the fact that there are so many settings available, and some of them require quite a lot of dismantling, if only to change the spring, the guides or the spacers that restrict the brake’s movement. On the other hand, once you’ve got the balance right, you can start having fun with it, and be surprised by the precision of degressive braking.
On the gas pedal, the progressive hardness movement is also very interesting. It has enabled me to develop a form of muscle memory for my accelerations, to be more precise and quicker out of corners.
And last but not least, there’s nothing to say about the clutch: it feels just right, realistic without overdoing it. Even if it took me a good week to find the ideal calibration and input curve.
The fact that you can change the hardness of the three pedals on the fly is quite an asset, and you can quickly switch from a road car feel to a GT feel in a matter of moments. Congratulations to Simgrade on their ingenious system!
Flo was also impressed by the quality of the throttle and clutch feel. However, with her size 35 shoe, even with the pedal pads set to the lowest setting, it was impossible for her to keep her foot on the ground during acceleration, for example.
But there’s a BUT!
Perhaps this is where I’d give you your biggest point of concern about the Simgrade VX Pro. During our first weeks of testing, I encountered a major problem: when I applied force to the brake, the pedal had very pronounced lateral movements, which really hampered me on the track. In concrete terms, as my brain was more occupied with trying to keep the pedal in line than with its degressive action, I was losing 1.5 seconds per lap in the Le Mans Hypercar race.
So I reported the problem to the brand, which was aware of the problem but assured me that “nobody was complaining”. WHAT? Seriously, guys? You’ve got a rolling pin instead of a brake and nobody’s shocked??? I was dumbfounded, but after all, some people buy pedalsets that literally bend under braking and think it’s “great”…
Fortunately, Simgrade was very reactive and immediately modified all the pedalsets they sell (so if you buy it from January 2025 you get the modification).
I was able to make the modification thanks to the brand’s instructions, but I had to redo all the tests, which were then distorted.
The result: it’s better, but still not perfect. There’s less flex under braking and it has much less impact on the quality of the degressives, but flex is still present. In my case, with a pressure setting of around 70Kg, I still manage to perform well with it. But it’s worth bearing in mind that even Flo, with a 50Kg setting, still has some flex.
So you’ve been warned!