We received the SimLab P1X Pro aluminum profile chassis a few weeks ago for a full test. After spending a good day assembling it and two weeks using it on a daily basis, we’d like to take a look at this cockpit, which once again demonstrates the full extent of SimLab’s expertise.
The SimLab P1X Pro in brief
How does the SimLab P1X Pro chassis look from a technical point of view?
| Chassis construction | Extruded aluminum sections |
| Seat | Optional SimLab or Sparco bucket seats |
| Dimensions | Footprint (excluding optional offset feet): 140x58cm At widest: 68cm Height (excluding adjustable feet): 83cm Width with support for 1 screen: 120.50cm |
| Driver size | From 1.50m to 2m |
| In the boxes | Extruded aluminum profiles. 160x40mm for bottom structure. 120x40mm for uprights. 80×40 for accessory supports. 40×40 for seat slide supports. Bolts and tools. Some parts to facilitate installation of accessories. Offset adjustable feet and rubber feet. QR Code to follow assembly instructions. |
| Price | from €799 inc. VAT The model we tested cost €1,387 inc |
First, a bit of background!
Sim Lab’s reputation is well established. The Dutch brand is renowned for producing professional-quality chassis. And it’s this brand that’s used by a large number of professional drivers and eSport teams, such as Mercedes AMG Petronas.
In addition to cockpits, they now also produce the XP-1 pedals we recently tested, the XB-1 handbrake, and as if that wasn’t enough, they also own the GRID Engineering brand. A company that produces professional-quality steering wheels, dashboards and button boxes.
This is the background to the P1X Pro, an aluminum profile chassis that replaces the old P1-X. With its 160×40 profile main structure, it’s more than rigid enough to accommodate jacks if you feel like it. Enough to last a lifetime of simracer use.
Assembling the SimLab P1X Pro
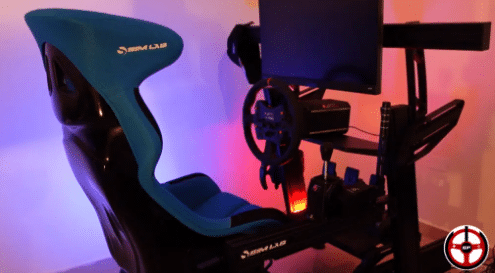
– 1 Sim-Lab Speed1 Blue seat
– 2 supports for the bucket
– Slides for the seat
– Integrated support for 1 monitor
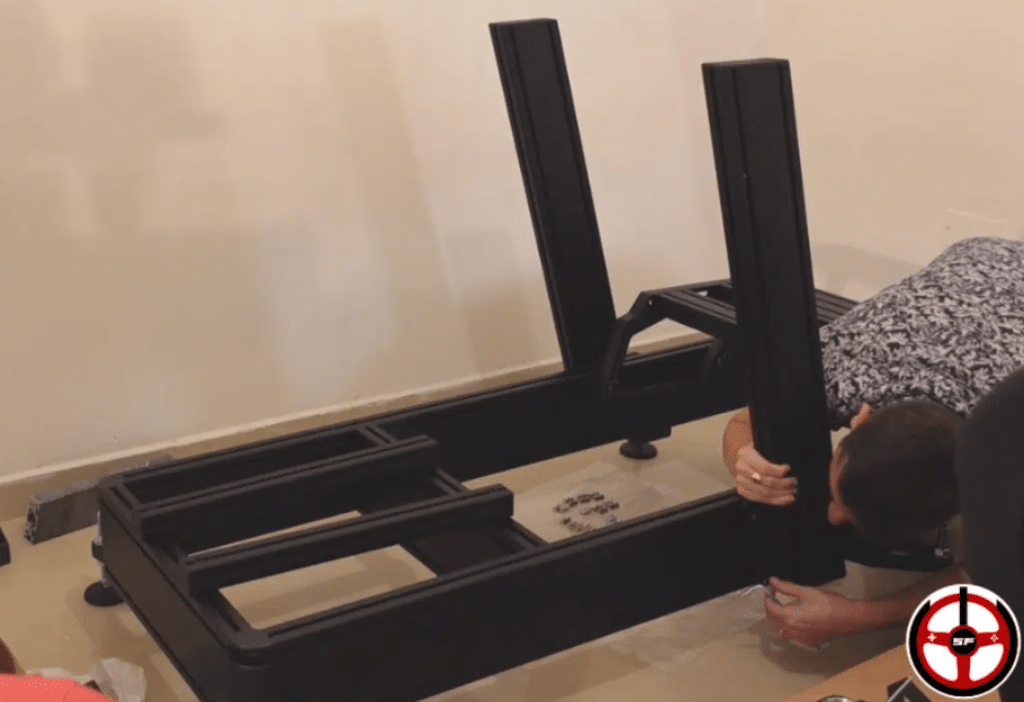
Before you can walk, you’ve got to know how to crawl. Well, it’s the same thing before rolling a profile!
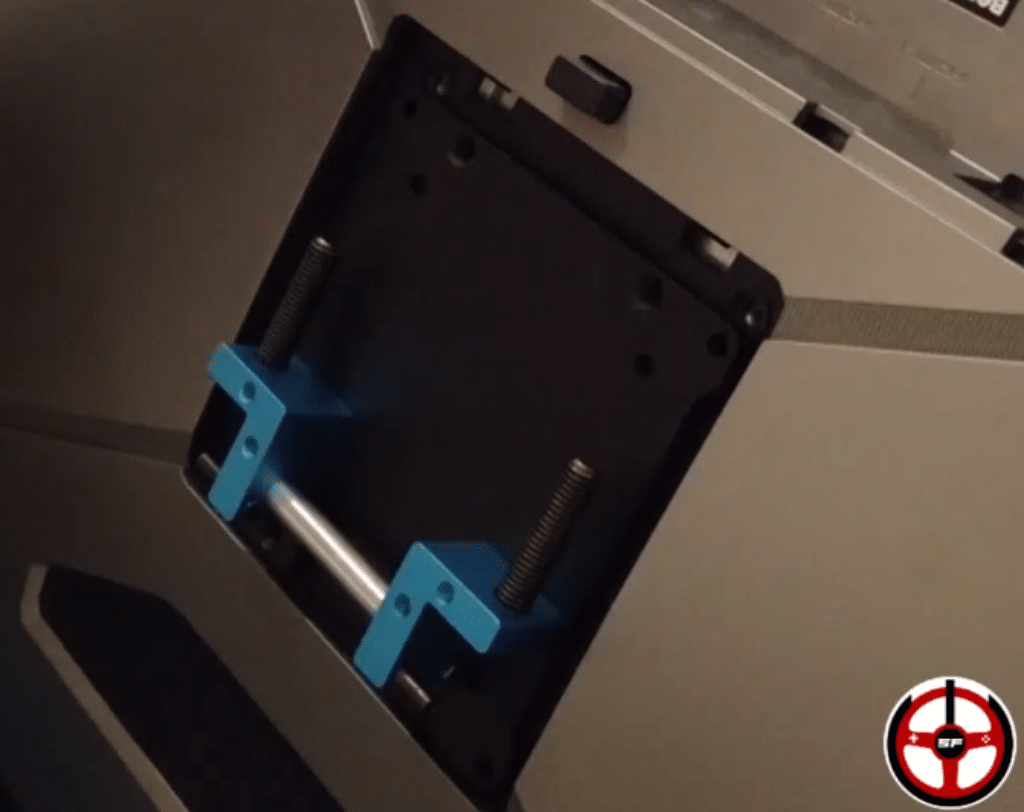
Flo and I took it in turns to assemble the complete chassis in 4h30. No more, no less. Of course, it’s possible to assemble it on your own, but you should be aware that it’s probably going to be a bit tricky, especially when it comes to installing the bottom bracket and the base plate. These are fairly heavy parts, which you’ll have to position while fitting the bolts and tightening the screws. No easy task with just 2 hands! Nevertheless, SimLab has prepared things very well, with very detailed and clear instructions (on QR code). As for the screws and bolts, they’re distributed in labelled resealable bags, so you know what to open and when.
But assembly means extruding bits of aluminum all over the room. And I’m telling you, watch out ! The profiles are painted black, but it’s not a baked-on epoxy paint, but a spray. This means that these parts can be scratched quite easily if, for example, you have the misfortune of putting one on a bolt… Yes, it’s true! Be especially careful with cellophane-wrapped parts, as they are fragile and visible.
As far as assembly was concerned, everything was simple and efficient. The only real sticking point, as always, was the seat slides. But there’s not much we can do about that, it’s always been a horror to install.
Installing the simracing equipment
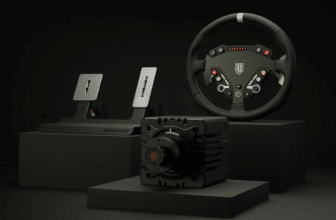
Okay, now that the SimLab P1X Pro is up and running, it’s time to start fitting the hardware! Flo made a list of all the hardware she wanted on the chassis, and here’s what she came up with:
- Asetek Invicta 27Nm rig
- SimLab XP1 pedalset
- SHH Newt3 gearbox
- Simagic TB-1 handbrake

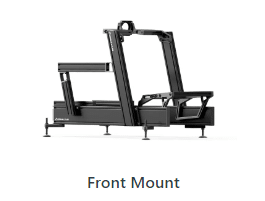
When you place your order, you can choose between several base/steering wheel mount options. In our case, the Wheeldeck was the most suitable, as we regularly change our base for testing purposes. But depending on the equipment you have at home, you can choose a front mount or a side mount specific to Fanatec bases.

AccuForce V1, V2
Fanatec CSL, CSW, CSL-DD, GT DD-PRO, DD1, DD2
Logitech G25, G27, G920/G923, G Pro
Lenze MCS12 series
Moza R5, R9, R12, R16/21
MiGe 130ST
Thrustmaster T248, T300/TX, T500RS, T-818, TC-PS, TS-XW
Simagic Alpha Mini DD, Ultimate
SimuCube 2 Sport, Pro
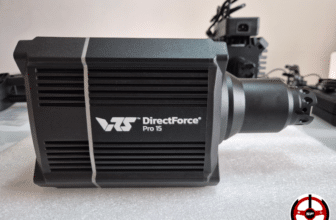
VRS DirectForce Pro
Fanatec CSW
Lenze MCS12 series
MiGe 130ST
Simagic Alpha Mini DD, Ultimate
SimuCube 2 Sport, Pro, Ultimate
VRS DirectForce Pro
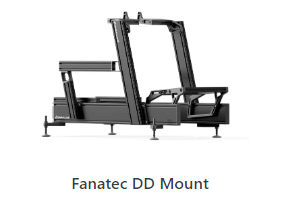
Fanatec DD2
Fanatec CSL DD
Fanatec DD Pro
Adjusting the piloting position
One of the great advantages of profiles is that you can adjust everything down to the millimeter. And that’s good news for Flo, who at 1.53m has never had a chassis that really suited her. But I’m not left out either, since at 1.74m I’ll only have to make 2 adjustments on the fly to adapt the chassis to my morphology.
For the seat (purchased as an option), as we’ve already discussed during assembly, there are two Sparco slides. These slides themselves can be moved forward or back during installation to adapt the chassis to the morphology of the player(s) who will be riding it.
The steering wheel support is adjustable in height and inclination by means of 4 T-nuts bolted to the frame uprights. Steering wheel distance management will depend on your support and base.
The extremely rigid, highly adjustable bottom bracket.
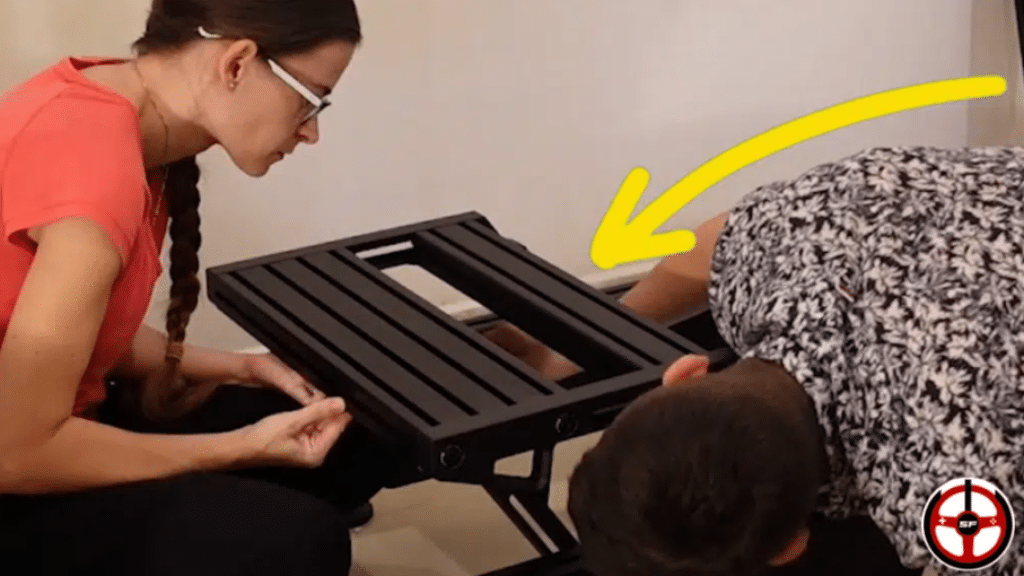
Next, the pedal assembly. It can be mounted on 6 different rails. The 2 rails on the rider’s side can be moved forward or back. And the entire bottom bracket itself can be mounted, lowered, advanced, retracted and tilted without restriction, with just 2 bolts.
The Vario Vesa adapter for adjusting the position of the screen to the… arm’s length.
Last but not least, the screen we install with the Integrated Support for Single Screen option also exceeds our requirements. First of all, the support structure can be moved forward, backward and tilted with 4 bolts. Then the Vario Vesa support allows fine adjustment of height, width and tilt.
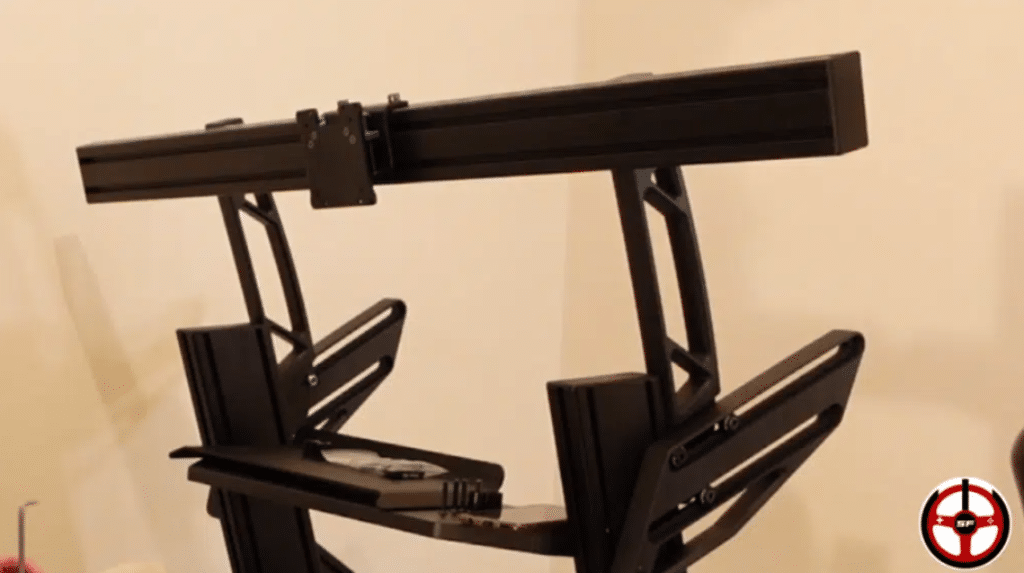
The single screen support.
SimLab P1X Pro comfort
So, how comfortable is this chassis? Well, after spending a day setting it up and making an initial series of adjustments, we quickly got the hang of it. The seat is well encompassing and offers INFINITELY better lumbar support than my old Track Racer bucket. And both Flo and I have found steering wheel height and pedal distance settings that suit us perfectly.
BUT, to be perfectly transparent, as I write these lines, it’s only been 2 weeks and a few days since we started riding it. There will obviously be a need for further adjustments over time. I’m thinking, for example, of the screen settings, which will change radically in a few days when we go from a 27″ to an ultrawide. I’ll keep you posted!
Faultless rigidity
This is surely the point that pleased us the most. The rigidity of the SimLab P1X Pro is exemplary. Whether it’s the brake support or the direct drive base. No matter how hard I tried to put it through its paces, it was all to no avail.
There’s a little flex in the bucket itself as you pass the 60Kg mark on the brake, but nothing perceptible during braking itself. And even at 95kg, I couldn’t move the bottom bracket one bit.
Why choose an aluminum profile frame rather than a tubular steel model?
Tubular frames are all well and good, but let’s face it: modularity is not their strong point. One of the great attractions of an aluminum frame is that you can put anything and everything on it, without any restrictions. Whether it’s brackets for buttons, handbrakes, gearboxes, dashboards, harness tensioners, jack systems… Everything is possible on a profile model.
On top of that, you can fine-tune everything to your physical needs and desires. Want to lower your Direct Drive base by 2.73cm and tilt it 120° to match pluto’s axis of rotation? It’s possible! To take a concrete example, Flo is 1.53m tall, and finding a chassis in which she can position herself correctly is hell! Especially as we have to juggle our two driving positions, which are very different since I’m just over 20cm taller than her. With a tubular model, we always had to make compromises. With a profile, we can each find exactly the right riding position for our size.
Finally, the last big advantage of a profile is its rigidity. Where tubulars can have bending points at the joints between parts, a profile (dimensioned consistently) will never bend.
What we thought of the SimLab P1X Pro
When you’re looking for a profile chassis that’s both attractive and, above all, modular, the P1X Pro can’t disappoint. SimLab has once again done a fine job with a chassis that not only lives up to its reputation, but is also elegant. And that’s no easy feat for a profile! Comfort and rigidity are well and truly up to scratch, and it has the luxury of being less expensive than its predecessor. In short, it’s going to stay at home for good.