OK, here it is at last. It’s time to test the Asetek Invicta pedals! 18 months after receiving it and having spent several hundred hours putting it through its paces, it’s time for a review. If you’re unfamiliar with Asetek and their pedal sets, a quick recap is in order: the Invicta is an uncompromising pedal set designed, first and foremost, to simulate prototype and formula brakes. Very hard, very short brakes that won’t please everyone, but which, if you take the time to get used to them, can really save you time on your lap times. But let’s put them to the test!
Asetek Invicta pedalset in brief !

Here, the pedal set is fitted with the optional clutch pedal.
| Compatibility | PC |
| Pedals | 2 (accelerator-brake), clutch optional. |
| Gas pedal | Spring movement Magnetic sensor 16-bit resolution 2 springs supplied (Light, Medium) |
| Brake | Two-step movement: hydraulic, interchangeable elastomers. 100-bar hydraulic pressure sensor. 3 elastomers supplied (Soft, Medium, Hard) |
| Vibrations | No |
| Connections | 1 USB-C output to PC or Asetek base (supplied: 1 USB-C -> USB-A 1 USB-C -> USB-C) |
| Price (Prices include VAT at 20%) | Invicta standard pedal set: €911.99 Invicta S pedal set (separate pedals): €959.99 Asetek Pagani Huayra R (technically identical to Invicta): €755.99 |
| Options (Prices incl. VAT at 20%) | Invicta clutch: €299.99La Prima clutch: €149.99Footrest brackets: €9.99 to €39.59 depending on modelAdditional elastomer kit: €50.39Long travel Kit (extends brake travel): €19.19Hard spring for gas pedal: €11.99Forte pedal pads: €39.59 (2 pedals) or €59.99 (3 pedals) |
All prices are expressed here WITHOUT promotions or discounts. Think of the SAMASLAN promo code to reduce your bill by 5%😉
Design and ergonomics
You either like Asetek’s design, or you don’t. But if there’s one thing everyone can agree on, it’s the quality of the components and assemblies. Quite simply, this is an all-aluminum model. Everything is made from the same material, from the plate to the inserts.
The footplate has a two-tone finish (black and brushed aluminum) and grooves to give your shoe a heel grip.
Then, just in front of the heel rest, there’s an LED strip whose color and intensity can be adjusted in a matter of seconds via the RaceHub software. But more on that later.
Another eye-catcher are all those orange knobs and elements on the pedalset. In reality, these are all the settings you can operate without tools.


In terms of ergonomics, with a few adjustments, we were able to find a brake pad setting that suited both Flo and me in terms of height and spacing. But for those who like to have their gas pedal and brake pedals far apart, Karting-style, then the Invicta S pedal set is the way to go. It’s similar to the Invicta, but the two pedals are separate.
The THORP module
The famous THORP module is at the rear of the brake pedal. This brake cylinder caused quite a stir when it was released, not only because of its quality/price ratio but also because, for the first time, it was a maintenance-free hydraulic brake.
But how does this THORP module work in practice?

Well, it’s pretty simple. At the rear of the module, you’ll find a rubber compound that compresses when the pedal is depressed. This rubber is enclosed in a cylinder by a nut fitted with a collar that acts as a stop to stop the physical movement. Above this cylinder is another charged with oil that “compresses” against the 100-bar hydraulic pressure sensor.
The movement is, therefore, adjustable thanks to the rubber pads, which can be changed in just under a minute. The hydraulics provide the pick-up. But that’s not all! In fact, the real advantage of this system is that it enables you to continue applying more pressure to the brake, even when you reach the rubber’s physical stop. The aim is to simulate the hardness of racing brakes during heavy braking. In other words, you have an initial braking phase with movement; then, you reach the hard point where you can apply even more force to brake harder.
Adding a third braking phase
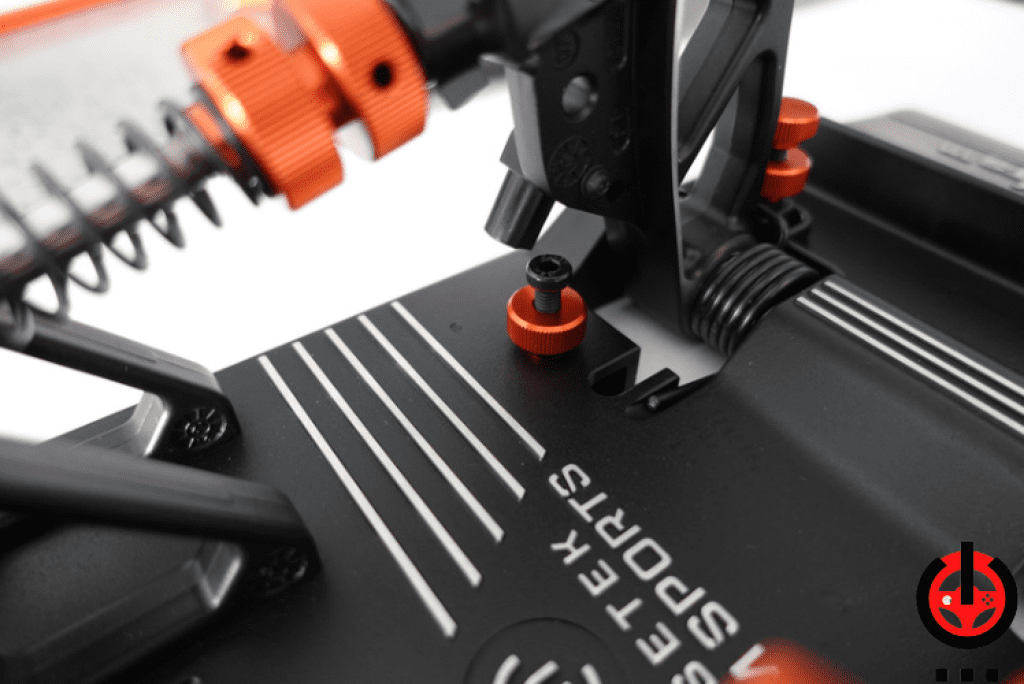
For those who want to take realism a step further, creating a first “free” movement zone is possible. This time, the idea is to replicate natural mechanical play. To add this mechanical play, the nut that locks the eraser in its cylinder is used:
- Place the rubber in the cylinder,
- screw on the flange nut until the rubber is just gripped, without forcing,
- unscrew the nut by half a turn, then lock the position with the lock nut,
- remember to add a dead zone to the software at the start of braking so that this “free” movement doesn’t send any input into play.
Adjusting brake hardness and stroke

The Invicta pedal set comes with 3 elastomers (soft, medium, hard). This gives you quite a choice when it comes to brake hardness. But if you want more choices to customize the feel a little more, then Asetek offers an optional rubber kit that adds 5 extra rubber compounds ranging from very soft to extremely hard.
And if, like me, you would like to travel a little more on the brake pedal, there’s the Long brake Kit. It increases pedal travel from 2.5cm to 3.5cm.
Installing the Asetek Invicta pedal set on the chassis
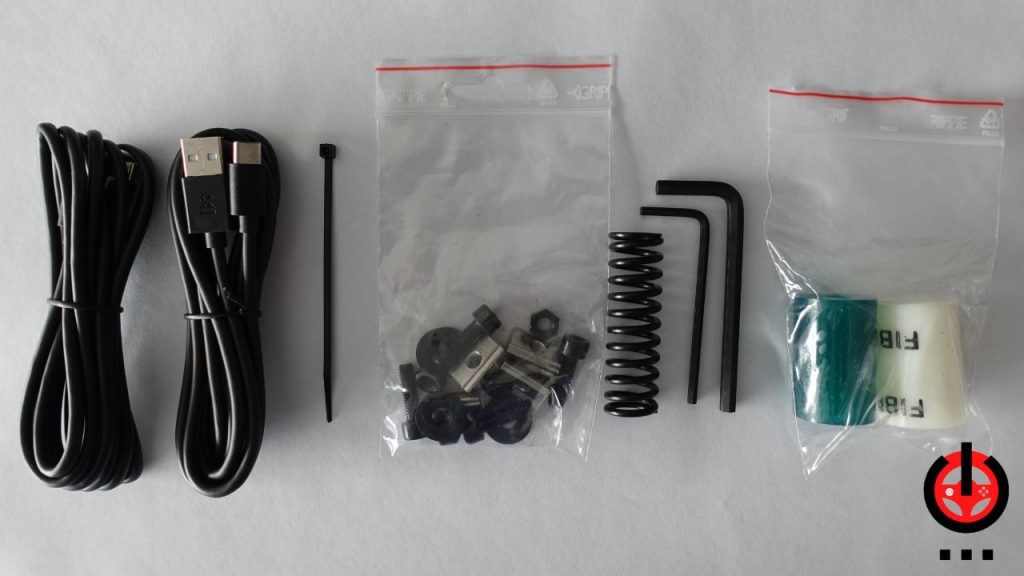
The next step is to install the pedals on the rig because, yes, the rig is mandatory, of course. Asetek delivers absolutely everything you need in the box. The screws and bolts are complete, and there are even T-nuts for owners of aluminum profile chassis. Allen keys are also supplied.
So, you just put the 4 nuts on, and off you go, right? Well, not necessarily. The screw locations are non-standard, so some of us will have to drill our chassis plate first. It’s nothing new, but unfortunately, this is often the case.
The pedals can be connected via USB. You can connect it directly to your PC or to your Asetek base unit. Cables are supplied in either case.
However, the USB port is directed towards the inside of the pedalboard. So you’ll need to plug the cable in and then turn it back to secure it with the supplied collar.
But why not point the USB port directly outwards? We asked Asetek. They didn’t want anyone to be able to pull the cable out or damage the USB port accidentally.

Physical adjustments are child’s play!
If there’s one thing I love about Asetek pedalboards (which has since been copied by many), it’s their ease of adjustment. Gone are the days when you had to crawl under the frame, banging your head against the aluminum bars and losing your tools and screws as they rolled mercilessly across the room! Here, almost all adjustments are made by hand in a matter of seconds. All the orange-painted nuts are settings you can change with just two fingers. It’s simple, fast and effective.
Remember to make your physical settings BEFORE moving on to the software settings, otherwise you’ll have to retype the calibrations 😉
Throttle settings:
- Pedal angle,
- Thrust,
- Spring hardness (2 springs supplied),
- Spring preloading to increase attack hardness,
- Horizontal and vertical pad adjustment.
Brake settings :
- Pedal angle,
- Zone of “free” movement before reaching the elastomer,
- Elastomer hardness (3 models supplied),
- Horizontal and vertical pad adjustment.

Finally, I’d like to remind you to adjust your riding position, both in terms of seat and bottom bracket distance/height. It’s a pain, I know, but it’s essential to get the most out of your gear!
RaceHub software settings
Now that you’ve set the pedal positions, it’s time for calibration. This takes place on the RaceHub software. Start by calibrating the throttle and clutch (if you’ve got one), then move on to the brake.
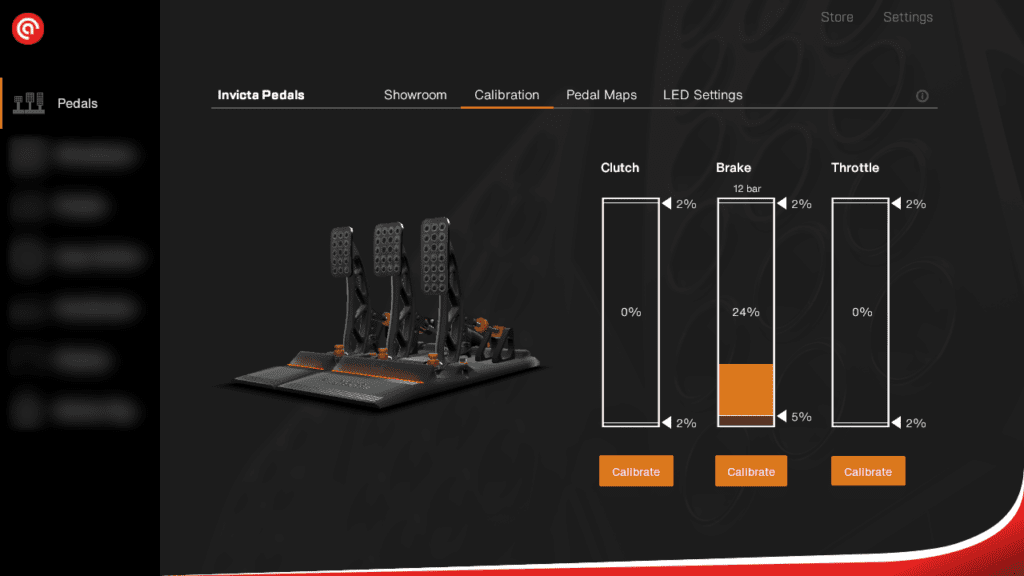
How to calibrate the brake?
To get the most out of your Invicta pedal set, you need to adjust it correctly. The first thing to do is set a small dead zone at the bottom of the curve to ensure you don’t have brake drag when your foot is resting on the pedal. Or, as we saw earlier, to match the mechanical play you’ve added at the start of the movement.
As for the rest, I’ve noticed from other users that there are two schools of thought regarding THORP module settings. Let me explain:
School 1: Use both phases to maximize realism
This is the method is recommended by Asetek, the philosophy with which they created this module. You press the brake until you reach the hard zone (the rubber stop), then add 5-10% more force. If you’re using medium to hard rubber, this setting will be perfect to stop the wheels locking up at every turn and maximize your muscle memory for progressive braking.
The downside is for those who use the softest rubber compounds. In this case, the demarcation between the movement of the rubber and the arrival on the hard zone is too distinct. But as Asetek CEO André Eriksen has said often enough, this pedalset is not designed to be soft. You’ve been warned!
School 2: Use the hard zone as a reference point
A journalist friend told me he loved his Asetek precisely because of this setting. Then I noticed that quite a few people were doing it, so I’m telling you about it!
This time, the idea is to put on the rubber you want and use the hard point as a reference point that tells you that you’re at maximum braking. It’s no longer a question of realism but rather of braking assistance.
The downside is that this will be most useful on soft rubber, as the movement-tyre/hard point-hydraulic transitions are difficult to feel when braking on medium and hard rubber.
Fine-tuning input curves
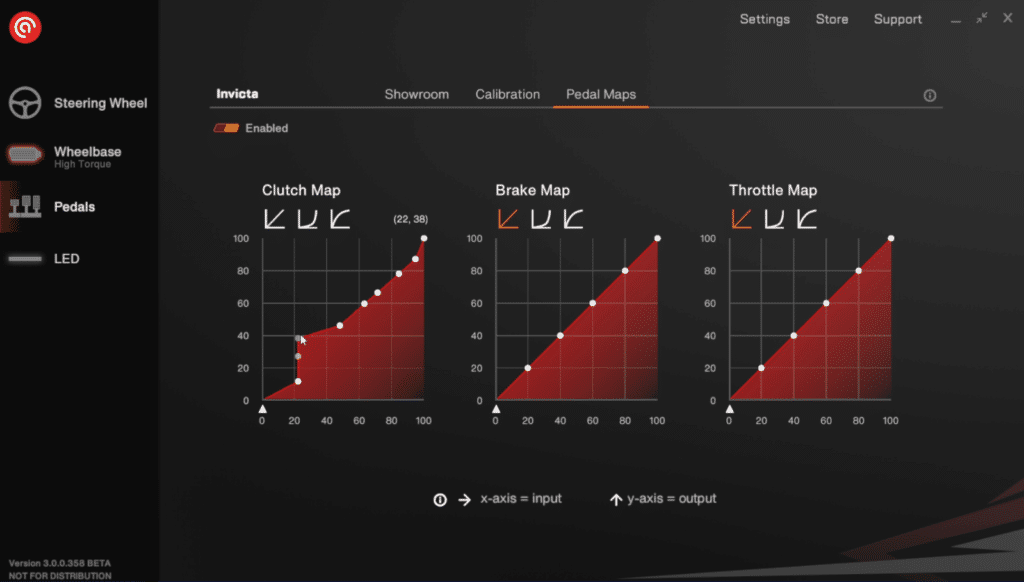
Next, we move on to the pedal input curves. These curves allow you to modify the amount of play sent by the pedal set as a function of the pedal position. For example, with a linear curve, if you apply 25% throttle, the game will put 25% throttle into the car. But if you’re using a progressive curve, for example, you could depress the gas pedal by 25%, but the pedal would only send 10% to the game. And vice versa… The point is to create curves that perfectly match your driving style and give you maximum control over the vehicle. In fact, in real racing cars, these settings also exist to adapt the vehicle to race conditions.
You can create as many curves as you like and save/load them as you see fit. You can also add sliders to create the perfect curve. In short, the job is impeccable.
Comfort and feel: we understand the expression “slamming on the brakes”
Once I adjusted, I took to the track for the first runs. Having long been used to the Forte, the brand’s mid-range model, I’m not fazed by this very hard, short brake. But beware if you’re not used to it: the first week will be frustrating!
You’ll need to take the time to work on your muscle memory to finally get back to your usual times, then exterminate them as you should. Yes, it’s a bit of an effort, but it’s well worth it. Once set up, the gas pedal also does its job perfectly. But if you’re playing in your living room, I suggest you put a little rubber on the throttle stop. Without it, beware of torque crises!
We’re driving, or instead, bombing! Then we hit the brake pedal at the end of the straight before ensuring a clean downshift that takes us all the way to the apex—a renewed pleasure every time. I note, however, that while the pedal set shows no wear at all after a year and a half, the soles of my shoes have suffered from the brake pads seizing up badly.
In short, when it comes to racing, I have nothing to say; it’s a no-brainer IF you like hard brakes that you come to strike with a vengeful foot.
A word about the optional Invicta clutch
I love manual gearbox cars, so getting the Invicta clutch to complement the pedal set was a no-brainer. At Asetek, there are two clutches: the La Prima, which has no kinematics but only a spring at the bottom of the pedal arm, and the Invicta, which has kinematics with an adjustable pendulum movement. The advantage of the pendulum movement is that you can feel the friction point and play with it more precisely than with a simple spring.
Installation is straightforward, with the clutch support plate fitting into the pedal set support. Screw the whole thing together with 4 small screws, then connect the cable under the pedal set so that the clutch is directly connected to the clutch/brake unit. This operation takes about 5 minutes. Then it’s on to the settings:
- Pedal angle,
- Bearing,
- Spring pre-loading to increase attack hardness,
- Friction point hardness adjustment,
- Horizontal and vertical pad adjustment.

On Racehub, you can create a dedicated clutch curve to match the physical and virtual friction points sent to the game. However, you can also modify the hardness of the friction point by lowering the pendulum movement. Personally, I found this setting superfluous, as the feel is already fine enough that you don’t want to reduce it any further.
The heel point is not necessarily easy, depending on the setting chosen.
Ahhh, the heel point! It is an increasingly rare technique among young sim racers who have never experienced the joys of manual gearboxes… Let’s face it: heel-toeing an Invicta pedalset isn’t easy! This is because it’s very difficult to maintain perfect brake pressure while giving the throttle to rev up the RPMs when you’re on hard rubber. It’s much easier with soft brakes. Mainly as the Invicta’s pedal pads seize up very hard, it takes an extra effort to manage the right ankle movement!
The brake set-up of an LMP2 endurance champion

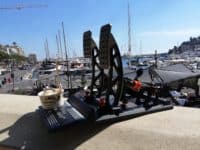
Last year, I took pedal units to Gustavo Menezes, LMP2 champion and Le Mans winner in LMP2 in 2016, who was at the time a Peugeot driver in the 9X8. We quickly found the ideal setting to replicate the prototypes on the Asetek Invicta pedal set:
– The yellow elastomer gave the ideal hardness.
– We used the Long Travel Kit to extend the brake travel slightly.
– The brake calibration is set to 70 bars.
– We left 2-3mm free pedal travel by loosening the elastomer tightening ring by half a turn. – An exponential braking curve (as proposed by Racehub).
Find out more: Everything we did with Gustavo at his home in Monaco
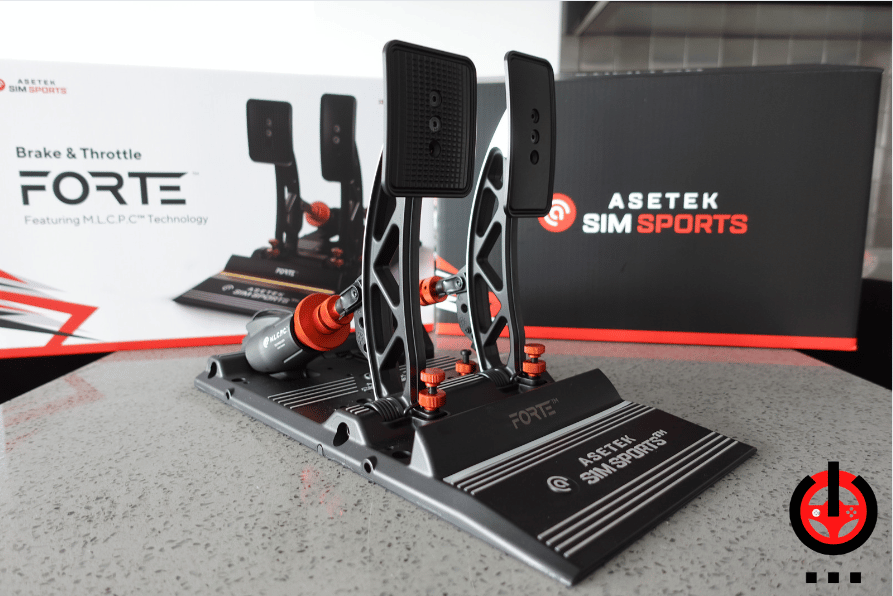
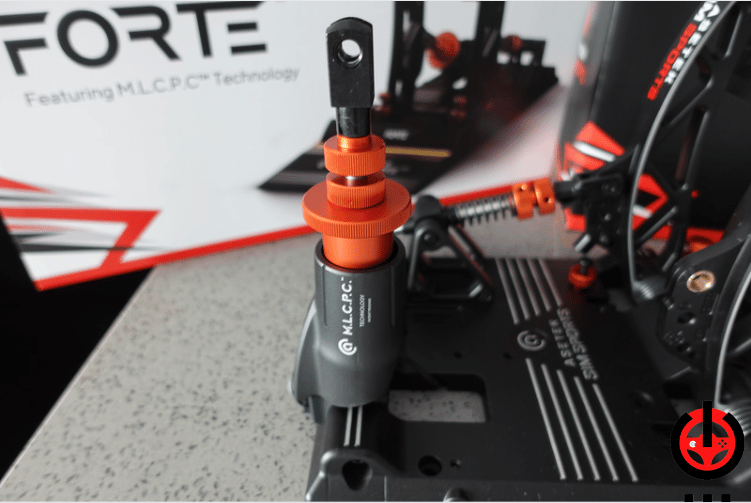
Differences between Forte and Invicta pedal sets
Now, there’s a pertinent question. Let’s not forget that Forte’s M.L.C.P.C. system is designed to replicate Invicta’s hydraulic module. So, having spent several months with the Forte and a year and a half with the Invicta, what’s my assessment?
Well, it’s very similar, but different all the same. The big difference between the two is the final braking phase. On the Forte, you have this rubber under the crown, which gives you a little millimeter of travel to push the brake all the way. On the Invicta, when it’s hard, it’s HARD. You’re literally pushing metal against metal. And it’s the hydraulics that transfer the force to the sensor. But in terms of overall feel, having these two very distinct and very hard braking phases is something that both the Forte and the Invicta do.

In my opinion, the Forte is more versatile than the Invicta. It has no hydraulic module, so it requires less force to reach 100% braking for the same rubber. Its brake stroke is also longer than the Invicta’s (3.5cm for the Forte, compared with 2.5cm for the Invicta without option).
But what I like most about the Forte is that the tread change is even quicker. I don’t have to get out of the bucket to change the rubber on the Forte, nor do I have to recalibrate the brake. On the Invicta, I have to get up (yes, I’m a slacker!), and if I’ve drastically changed the hardness of the rubber, I’d have to reload a calibration backup.
I had the chance to have a pro driver test equipment in the GT4 and GT3 categories (a video will be coming soon on the subject). As you know, GT brakes are longer and softer than proto/formula brakes.
But to my great surprise, when we tried the pedal adjustments, it turned out that he preferred the Forte with the yellow rubber (from the elastomer kit) with a brake calibration of 75Kg. An adjustment, therefore, was “quite hard,” but it gave him complete control over his degressive braking.
What we thought of the Asetek Invicta pedal set model