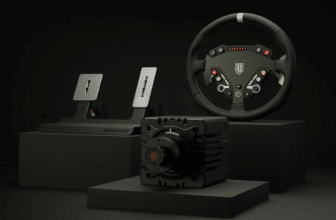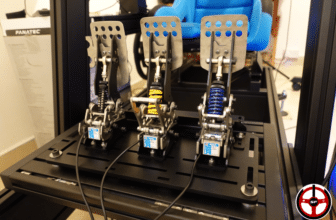
Today, it’s time to test the VRS Pro Pedals! The brand’s iconic model, much appreciated by esport racers. So, how does this pedalboard fare against our first tests? Let’s find out!
Prices and deliveries
VRS Pro Pedals technical specifications
| Compatibility | PC. |
| Pedals | 2 pedals (accelerator-brake), Optional clutch. |
| Gas pedal | Linear spring movement, Load Cell sensor (8.4Kg max on pedal), 16-bit resolution (65,536 points). |
| Brake | Spring-applied with non-linear kinematics, Load Cell sensors (140Kg max on pedal), 16-bit resolution (65,536 points). |
| Clutch (optional) | Spring movement with kinematics, Load Cell sensor (30Kg max on pedal), 16-bit resolution (65,536 points). |
| Vibration | No |
| Chassis mounting | Screw directly onto your chassis (4 screws per pedal not supplied) |
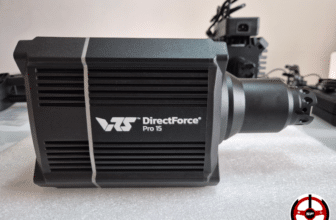
| Connections | Control box with USB-B USB-A socket for connection to your PC, |
| Options | Gas pedal damper, 76€. Brake and/or clutch damper, 70€. Clutch, 227€. |
Design and ergonomics
In the box
- VRS Pro pedals.
- USB-B to USB-A cable.
- Control box.
- Red spring (hard) for the brake.
- Spacers and washers for installing the red spring.
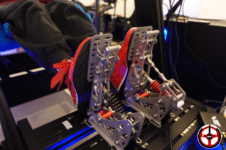
Upon unpacking, the pedalboard makes a good first impression thanks to the overall quality of its materials. All steel and aluminum. The pedals themselves consist of two uprights connected by numerous crossbars securely screwed together on each side. There’s no lateral bending, which was my fear with this type of construction.
The control box is made of metal and can be attached to your chassis. A USB-B USB-A cable is supplied for connecting the box to your PC. Last but not least, a red spring is included in the bag, which will drastically harden the brake (140Kg max vs. 65Kg for the blue spring).
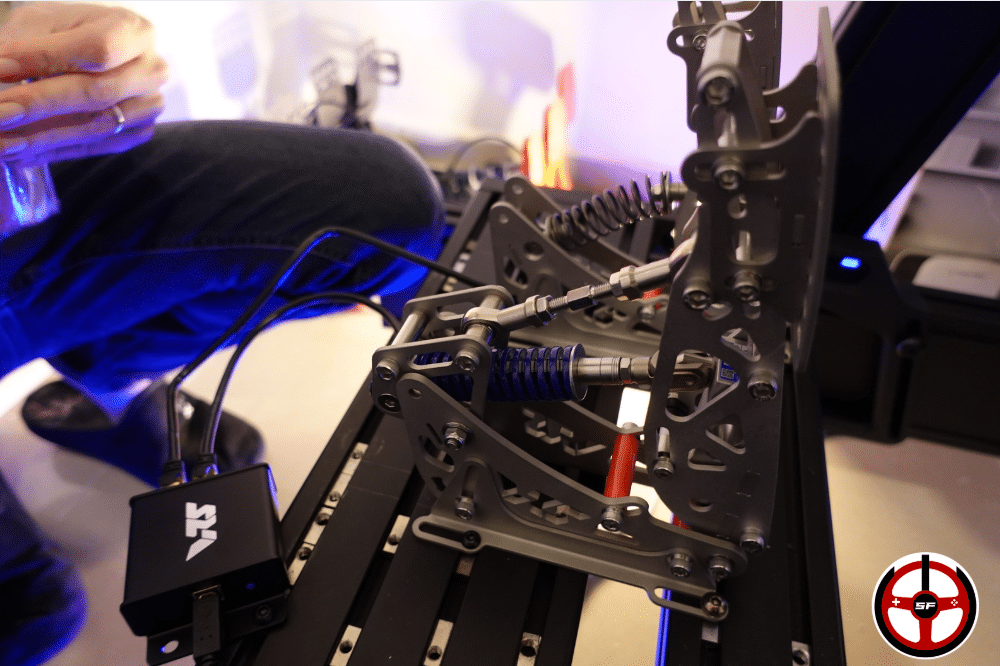
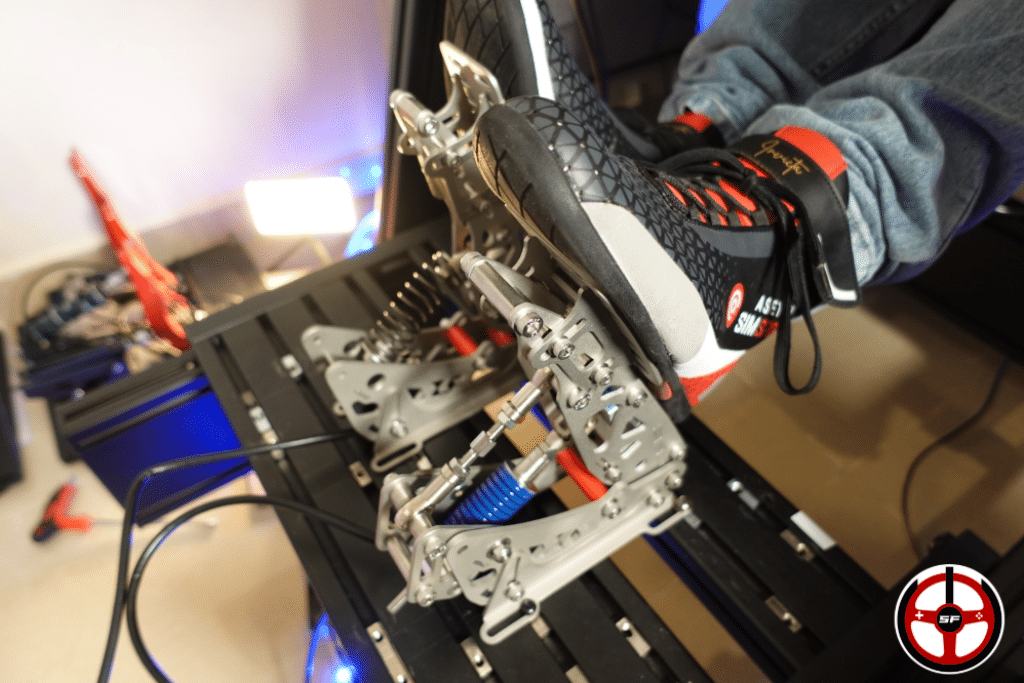
The gas pedal has a rather surprising linear movement , as it rests solely on its spring and has no guide axle! VRS’s aim was to make the movement as smooth as possible, avoiding the friction that can be caused by a shaft. All this while reducing the need for maintenance, since this part of the pedalset won’t need to be greased.
Brake movement is progressive , thanks to kinematics that give a feel that hardens as weight is added to the pedal. Again, it’s very smooth, even if we had to apply a little grease to avoid untimely squeaks.
On the other hand, there are no screws to mount the pedals and housing to the chassis, so you’ll have to rummage around in your toolboxes or take a trip to your local hardware store!
What do we have here in the way of sensors?
The VRS pedalset brake is equipped with a large Load Cell (senses the weight you put on the brake rather than its position) with a capacity of 200Kg. In fact, you can put a maximum of 140Kg of force on the brake pad with the red spring, which is more than enough to replicate the forces of Formula or prototype bikes.
On the gas pedal side, there’s also a Load Cell sensor on which you can build up to 8.4Kg of force on the pedal pad. Out of the box, we measured a force of 6Kg. That seemed more than enough, but I could reduce or increase the force later if necessary.
Sensor resolution is 16bits. From the outset, this puts the captation in the upper echelons of simracing pedalboards. A very good point for maximizing precision during brake attacks and degressive braking!
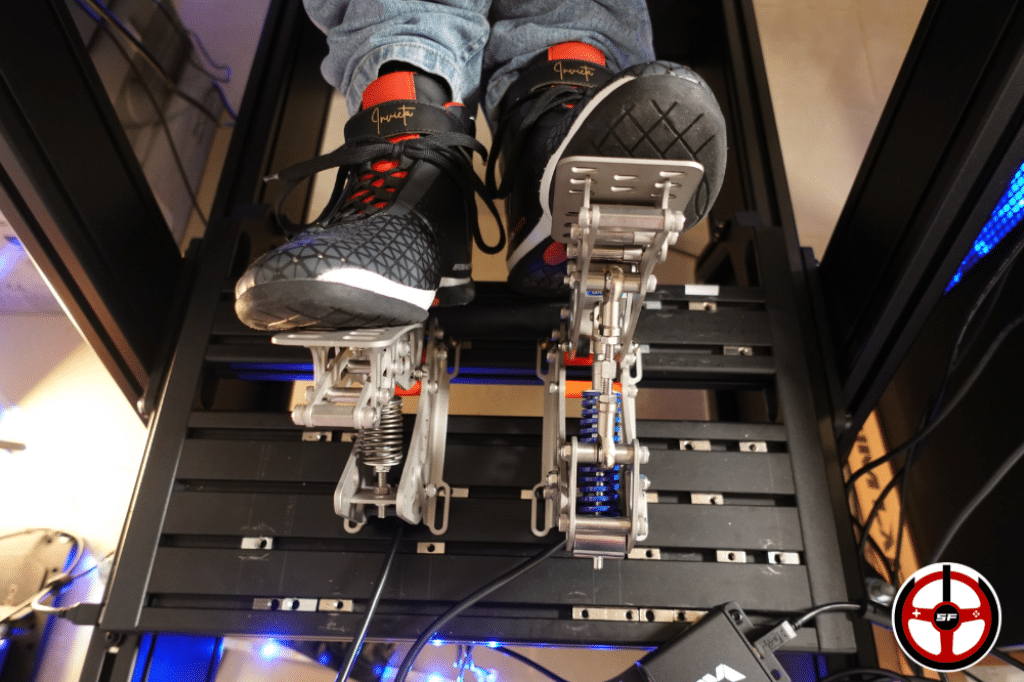
Mounting the pedalset on the chassis
OK, let’s get down to assembly, and it’s going to be a breeze! Once you’ve found 8 screws (in my 4 I found 8 M6 10mm screws), all that’s left to do is position the pedals on your support plate or aluminum profiles. You may have noticed that I haven’t mentioned the support plate or the heel piece? Well, that’s simply because the brand doesn’t offer them for purchase. So make sure your frame has the right holes or rails to receive the pedals and adjust them to the right position for you!
I connect the pedals to the box. Then I connect the box to the PC, and off I go to calibrate the VRS software.
Setting up the VRS software
I start by downloading the VRS application, which you can find here. And off I go!
The first thing to do, of course, is to calibrate the pedals. And the great news is that you can create as many calibrations as you like, and save them independently of the input curves! So I’ll be able to have fun mixing settings to test and find the input feelings/response for me.
We’ll then create dead zones at the beginning and end of movements, and adjust the input curves. That’s it! It’s simple, fast, efficient and no-frills. A quick save of my settings in the control box and I won’t even need to open the software to ride (unless, of course, I want to change the settings again…).
Setting up the VRS Pro Pedals
I quickly realized that the physical settings of the VRS pedals are very complete… But almost all of them require the use of tools. We can console ourselves with the fact that your settings probably won’t change every other day, but it’s still a point worth emphasizing. These settings include
- General tilt of the entire pedal at an angle of 21°,
- Pedal plate depth over 2cm,
- 3cm pedal pad height,
- 30° pedal pad tilt,
- Gas pedal spring preloading measured from 4.5 to 8.4Kg,
- Brake hardness and preloading: 65Kg with blue spring, 140Kg with red spring,
- Throttle and brake stops to reduce pedal travel.
Comfort and feel on the VRS Pro Pedals
Now it’s time to hit the track! And this is where Flo and I were really surprised. First of all, the throttle is really very fluid, and without having to modify its hardness, we found ourselves with a feeling that pleased us both so much. That’s very rare! But it was the brakes that gave us the most pleasure.
If you know us at all, you’ll know that our thing is generally short, hard brakes. We might have thought that the long, relatively soft feel of the brake with the blue spring wouldn’t suit us. Well, the opposite was true! The brake’s response and the gradual increase in hardness thanks to its kinematics enabled me to find my bearings straight away and perform relatively well. The brake stop can be used to indicate when you’ve reached 100% braking (if you calibrate the brake around 65Kg). It reminded me a little of the Asetek Forte pedal but with more pedal movement and a much softer attack. Degressive braking is also fairly easy to negotiate, thanks once again to the pedal’s progressiveness.
If you’re looking for a GT or esport setting, then this is the spring I’d advise you to work on.
On to the red (hard) spring
I then install the red spring, eager to see what the pedalboard can do when you tap into it. But surprisingly, I didn’t have the most fun with it. Of course, my familiarity with hard brakes meant that I was immediately within 2-3 tenths of my usual times. But the very progressive feeling I had on the blue spring was a little erased on the red spring, and the degressives were a little more blurred.
I’m going to continue testing with the red spring over the coming weeks to try and find a setting that suits me better. We’ll talk about it in the long video!
My opinion on the VRS Pro Pedals